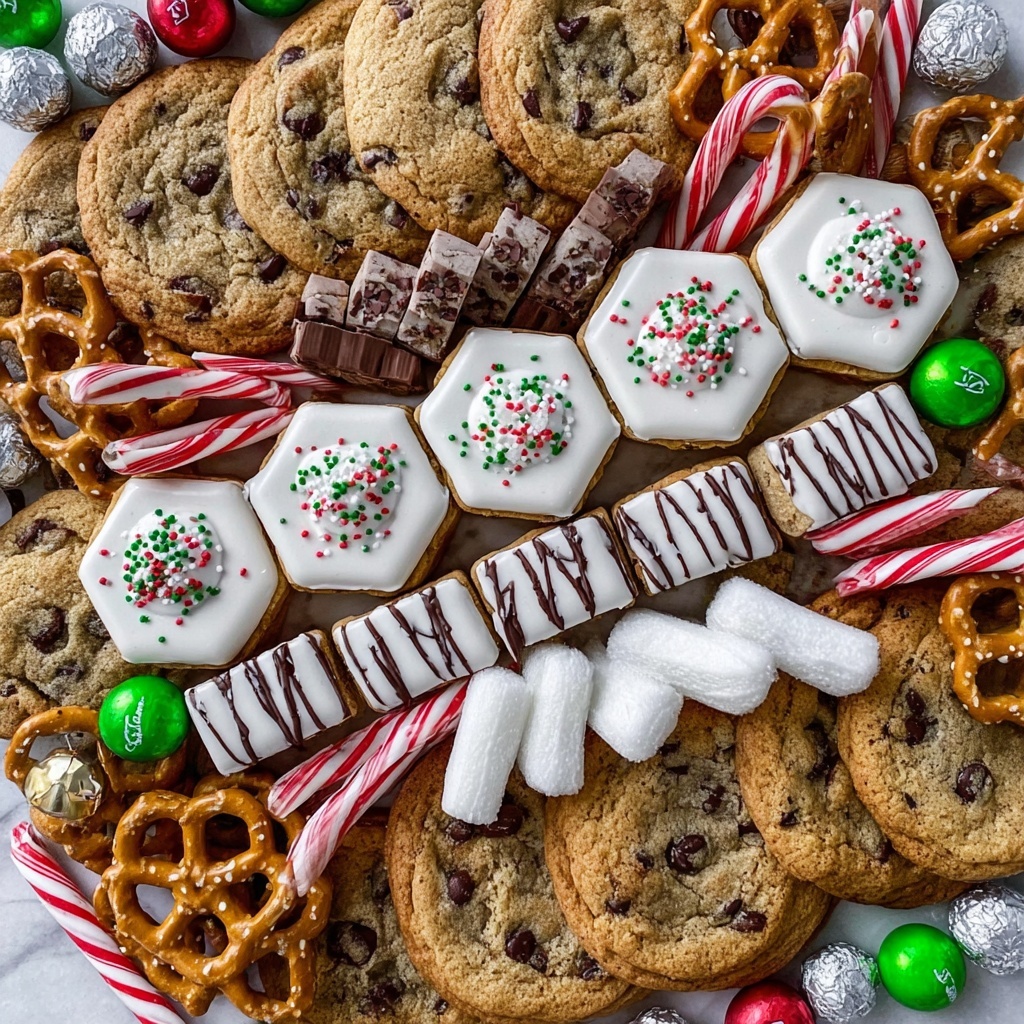
If you’re looking for a showstopper to brighten up your holiday celebrations, this Christmas Dessert Board Recipe is the ultimate crowd-pleaser that combines festive charm with delectable treats. This board is a harmonious mix of textures, colors, and flavors that dance together like your favorite holiday carols. Every bite offers a nostalgic wink with classic desserts like Zebra Cakes and chocolate chip cookies, while the colorful candy canes and sprinkles deliver that cheerful Christmas spirit. Whether you’re hosting a gathering or surprising your loved ones with something sweetly memorable, this Christmas Dessert Board Recipe is a creative, effortless way to bring everyone together around a beautifully themed dessert display.
Ingredients You’ll Need
The magic of a stellar Christmas Dessert Board Recipe lies in its simple yet thoughtfully selected ingredients. Each element plays a key role, adding a unique flavor, texture, or burst of color to your holiday spread, making sure your board is visually stunning and irresistibly tasty.
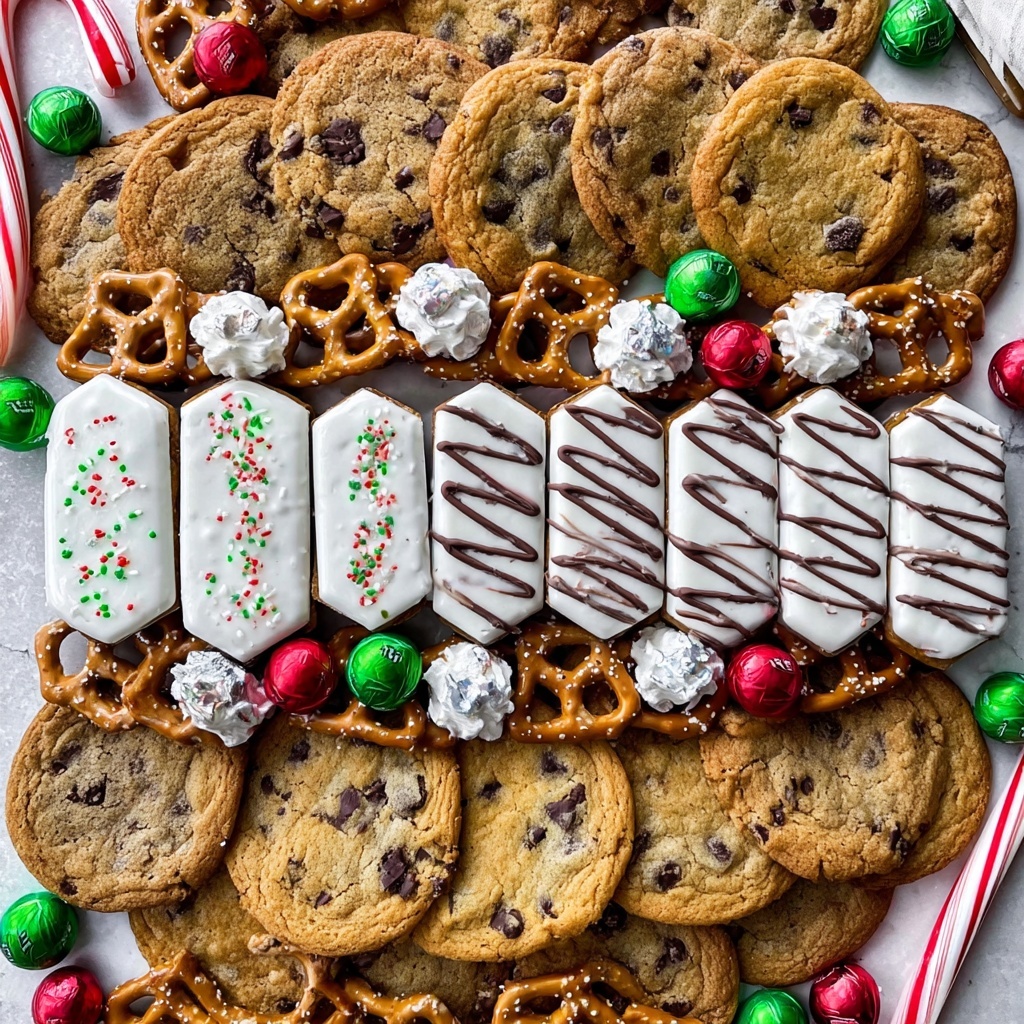
- Zebra Cakes: These soft, marbled treats form the sweet centerpiece with their creamy filling and striped design.
- Chocolate Chip Cookies: Classic and crunchy, they add a comforting, nostalgic touch.
- Mini Oatmeal Frosted Cookies: Small but flavorful, to fill gaps and add a cozy texture.
- Mini Powdered Donuts: Light and fluffy, dusted with powder for a snowy effect perfect for winter.
- Chocolate Covered Pretzels: A delightful contrast of salty and sweet with a crunchy snap.
- Green and Red Candy Canes: Iconic seasonal sweets that provide vibrant pops of color and minty freshness.
- Candy Cane Sticks: Chunkier candy canes to add height and bold festive shapes.
- Green and Red Twist Pops: Swirled lollipops to bring a whimsical, playful vibe.
- Red and Green Rock Candy Pops: Crystalline candies that sparkle like holiday ornaments.
- Pirouline Wafers: Elegant rolled wafers to introduce a delicate texture and sophistication.
- Christmas Mix Kisses: Bite-sized chocolate accents that melt in your mouth and fill spaces attractively.
- Red and Green Sprinkles: Festive little details that add the finishing touch of color and fun.
How to Make Christmas Dessert Board Recipe
Step 1: Prepare Your Board
Start by making sure your board is clean and completely dry. A pristine surface not only looks inviting but also helps prevent any unwanted slippage of your beautifully arranged treats.
Step 2: Lay Out the Foundation
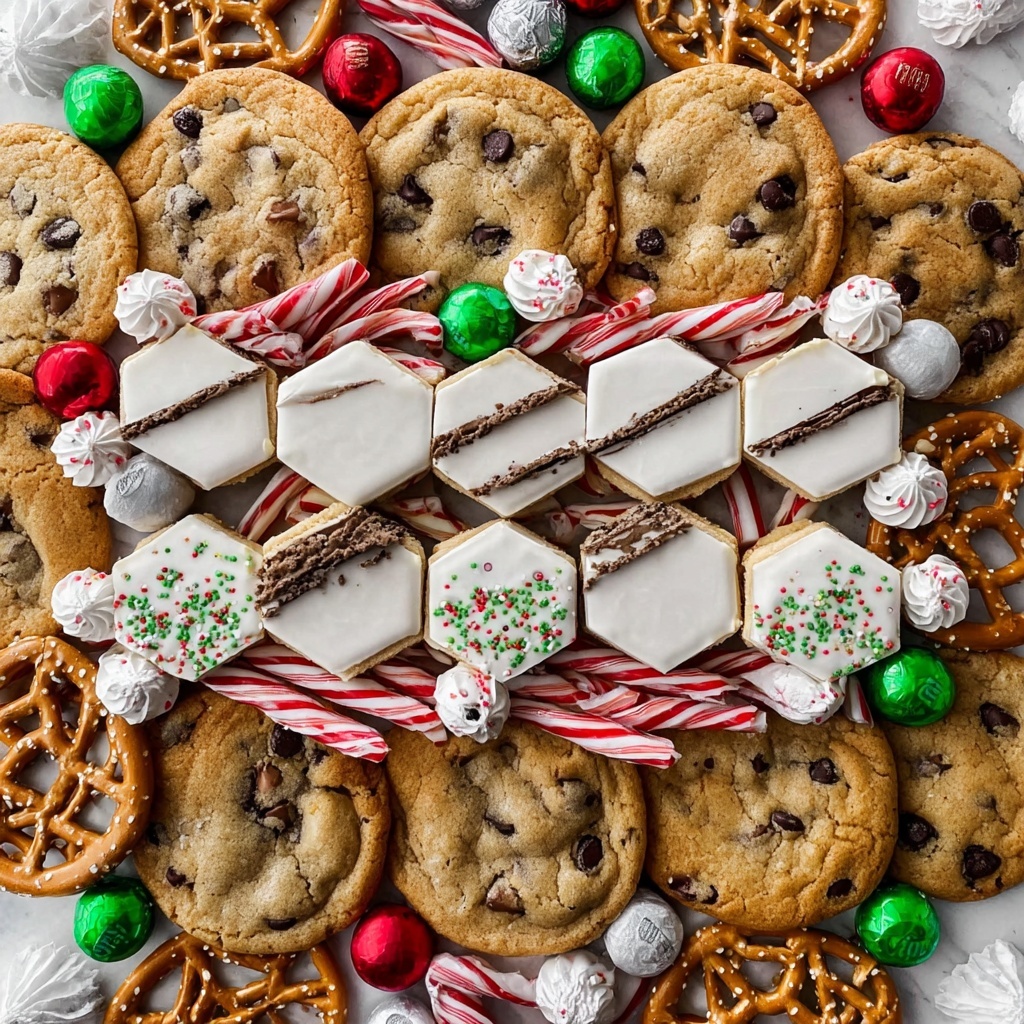
Begin arranging your board by placing the Zebra Cakes neatly in the center. Surround these with the chocolate chip cookies forming a welcoming ring. This will create the foundation both visually and flavor-wise, balancing creamy, soft, and crunchy delights.
Step 3: Add the Mini Powdered Donuts
Position the mini powdered donuts just outside the cookies to create layers. Their snowy white coating adds a wintery touch and introduces soft, fluffy texture right at the edges.
Step 4: Distribute the Pretzels and Oatmeal Frosted Cookies
Place the chocolate covered pretzels strategically on each side of the chocolate chip cookies, balancing salt and sweetness. Then, fill the spaces between the cakes and cookies with mini oatmeal frosted cookies to cover gaps and enrich the texture palette.
Step 5: Sprinkle the Colorful Candy Canes and Pops
Arrange the candy canes, twist pops, and rock candy pops across the board for vivid bursts of red and green. Position twist pops diagonally on the corners and scatter the candy canes randomly to keep it lively and festive.
Step 6: Fill Open Spaces with Pirouline Wafers and Mini Cookies
Add pirouline wafers diagonally across empty spots to bring a touch of elegance and crunch. Top chocolate chip cookies with mini oatmeal frosted cookies to smooth out any visual gaps and maintain a cohesive look.
Step 7: Add Christmas Kisses and Peppermint Sticks
Drop Christmas mix kisses generously around the board to fill in smaller gaps with decadent chocolatey goodness. Use peppermint sticks to add pops of vibrant color and height wherever the board feels like it needs a festive lift.
Step 8: Final Decoration with Sprinkles
Sprinkle red and green sprinkles liberally all over your dessert board. This final touch makes the entire setup feel joyful, lively, and irresistibly festive.
Step 9: Serve and Delight
Your Christmas Dessert Board Recipe is now a feast for both eyes and taste buds! Gather everyone around and enjoy this delightful holiday spread that invites sharing and smiles.
How to Serve Christmas Dessert Board Recipe
Garnishes
To enhance your Christmas Dessert Board Recipe, consider adding fresh mint leaves or edible gold leaf as elegant, subtle garnishes. These not only elevate the presentation but also offer a refreshing contrast to the rich sweets.
Side Dishes
Pair this dessert board with warm beverages like hot cocoa, spiced apple cider, or your favorite holiday tea. The warmth of these drinks complements the sweet and salty board, making each bite feel cozy and comforting.
Creative Ways to Present
Try serving the dessert board on a rustic wooden slab, a festive platter, or a mirror tray to reflect the colors and make your holiday display even more dazzling. Adding small fairy lights or fresh pine sprigs around the board can instantly uplift the festive vibe and create a magical setting.
Make Ahead and Storage
Storing Leftovers
If you have any leftovers (and that’s quite likely!), cover your dessert board tightly with plastic wrap or transfer individual components to airtight containers. Store at room temperature for up to two days to keep cookies and cakes fresh without condensation turning them soggy.
Freezing
Most components on the Christmas Dessert Board are best enjoyed fresh, but you can freeze items like Zebra Cakes and cookies separately in airtight containers for up to a month. Just make sure to thaw them at room temperature before arranging your board again.
Reheating
This dessert board is designed to be served chilled or at room temperature, so reheating is not necessary. If you prefer warm cookies or donuts, warming them briefly in the oven for a few minutes can add a delightful cozy touch.
FAQs
Can I customize the Christmas Dessert Board Recipe?
Absolutely! This recipe is super flexible. Feel free to swap out any items for your favorite treats or to accommodate dietary needs. Adding nuts, dried fruit, or other festive candies can make the board uniquely yours.
How many people does this dessert board serve?
This Christmas Dessert Board Recipe is perfect for a small gathering of about 6 to 8 people, depending on appetites. It’s great as a centerpiece dessert or a shared sweet snack during holiday parties.
What type of board should I use?
A wooden or marble cheese board works beautifully for this dessert arrangement. Just ensure it’s clean and dry. Choose a size that comfortably fits all the ingredients with room for creative placement.
Can I prepare the dessert board in advance?
You can assemble the majority of the board a few hours ahead and cover it; however, adding sprinkles and delicate candies just before serving keeps things fresh and colorful.
What if I don’t have all the candy items listed?
No worries! This Christmas Dessert Board Recipe shines with what you have on hand. Simply replace missing candies with other festive sweets or chocolates that match your holiday theme and color scheme.
Final Thoughts
Creating a Christmas Dessert Board Recipe is one of the most joyful ways to bring holiday cheer right to the table, combining ease, creativity, and festive flavor all in one. Whether you’re surprising your guests or indulging your own sweet tooth, this dessert board invites everyone to savor the season together. So grab your favorite treats, follow these simple steps, and watch as your board becomes the heart of your holiday celebration!
Print
Christmas Dessert Board Recipe
- Prep Time: 10 minutes
- Cook Time: 0 minutes
- Total Time: 10 minutes
- Yield: 1 dessert board (serves 8-10 people)
- Category: Dessert Platter
- Method: No-Cook
- Cuisine: American Holiday
Description
Create a festive and visually delightful Christmas Dessert Board featuring an assortment of cookies, cakes, candy canes, pretzels, and colorful holiday-themed sweets perfect for holiday gatherings and celebrations.
Ingredients
Sweet Cakes & Cookies
- 4 Zebra Cakes
- 18 Chocolate Chip Cookies
- 1 Pack of Mini Oatmeal Frosted Cookies
- 4–6 Mini Powdered Donuts
Candies & Candy Canes
- 1 Bag of Chocolate Covered Pretzels
- 14 Green and Red Candy Canes
- 4 Candy Cane Sticks
- Green Twist Pops
- Red Twist Pops
- 14 Red and Green Rock Candy Pops
- Christmas Mix Kisses
Additional Decorations
- 8 Pirouline Wafers
- Red and Green Sprinkles
Instructions
- Prepare your board: Clean and thoroughly dry your serving board to ensure it is ready for the dessert assembly and to prevent any moisture from affecting the treats.
- Start arranging main treats: Lay out the Zebra cakes, mini powdered donuts, and cookies as the base of your board design.
- Center the Zebra cakes: Place the 4 Zebra cakes in the center of the board, forming the focal point of your dessert display.
- Surround with chocolate chip cookies: Arrange the chocolate chip cookies evenly around the Zebra cakes to create layers of visual appeal.
- Add powdered donuts around cookies: Place the 4 mini powdered donuts on the outer edge, surrounding the chocolate chip cookies for variety and texture.
- Select candy elements: Gather pretzels, oatmeal cookies, candy canes, rock candy pops, swirl pops, and pirouline wafers for decorative placement next.
- Place pretzels strategically: Position the chocolate covered pretzels on each side of the chocolate chip cookies in the middle area of the board for a salty-sweet contrast.
- Decorate corners with pops: Lay the green and red twist pops diagonally on two opposite corners of the board, and place the rock candy pops similarly on the other corners.
- Distribute candy canes: Randomly arrange the red and green candy canes throughout the board to add festive flair and color.
- Fill gaps with wafers and oatmeal cookies: Place the pirouline wafers diagonally in open spaces and layer the mini oatmeal cookies on top of the chocolate chip cookies to cover remaining gaps and add texture.
- Scatter Christmas kisses: Disperse Christmas mix Kisses throughout the board to fill small gaps and enhance the holiday theme.
- Add peppermint sticks: Position the peppermint sticks where you feel the board needs additional pops of red and white color for balance and vibrancy.
- Finish with sprinkles: Sprinkle red and green sprinkles liberally all over the board for a festive and fun finish.
- Serve and enjoy: Present your beautifully arranged Christmas Dessert Board and enjoy with family and friends at your holiday gathering.
Notes
- Arrange the board on a large wooden or decorative platter to enhance presentation.
- You can customize the candy selection based on dietary preferences or availability.
- The dessert board requires no cooking, making it quick and easy to assemble.
- For a gluten-free version, substitute cookies and cakes with gluten-free alternatives.
- Keep the board refrigerated if not serving immediately to maintain freshness of treats.
- Use a variety of colors and textures for an eye-catching display.


