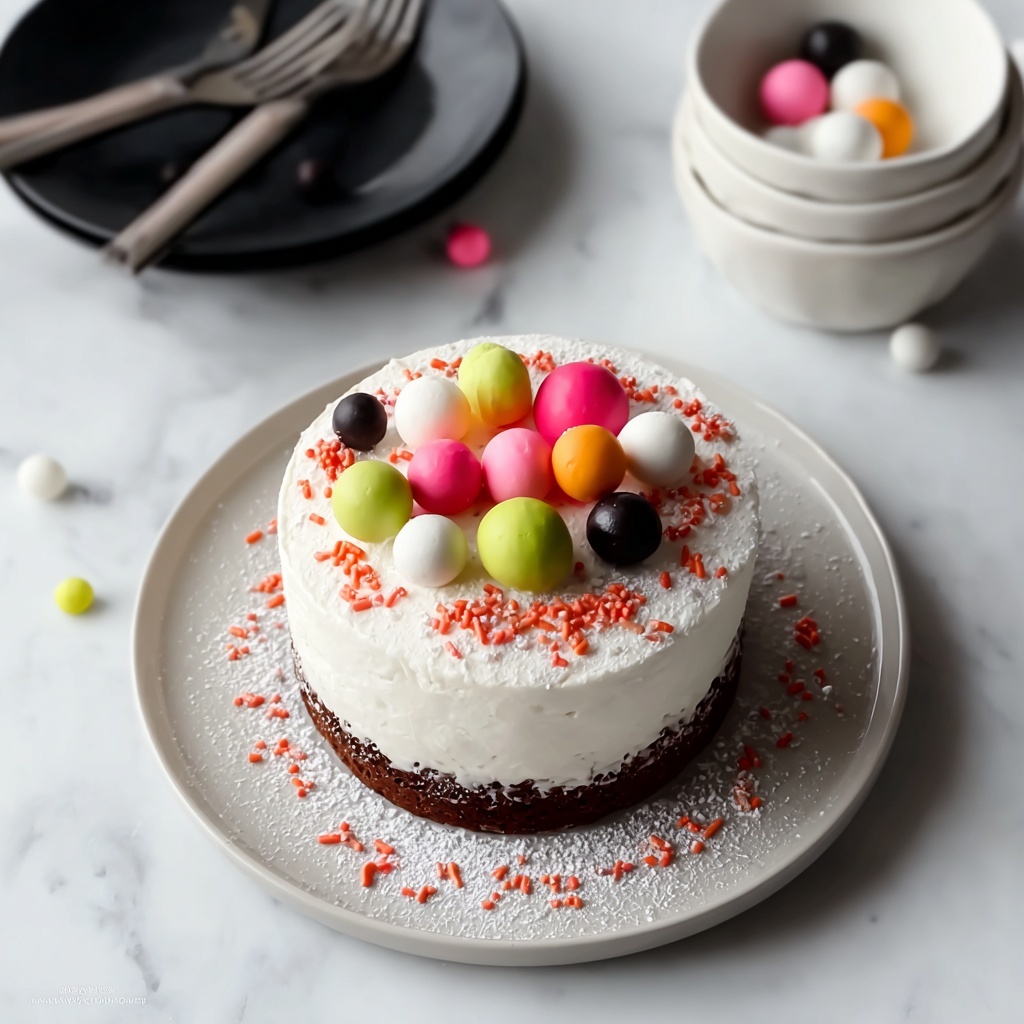
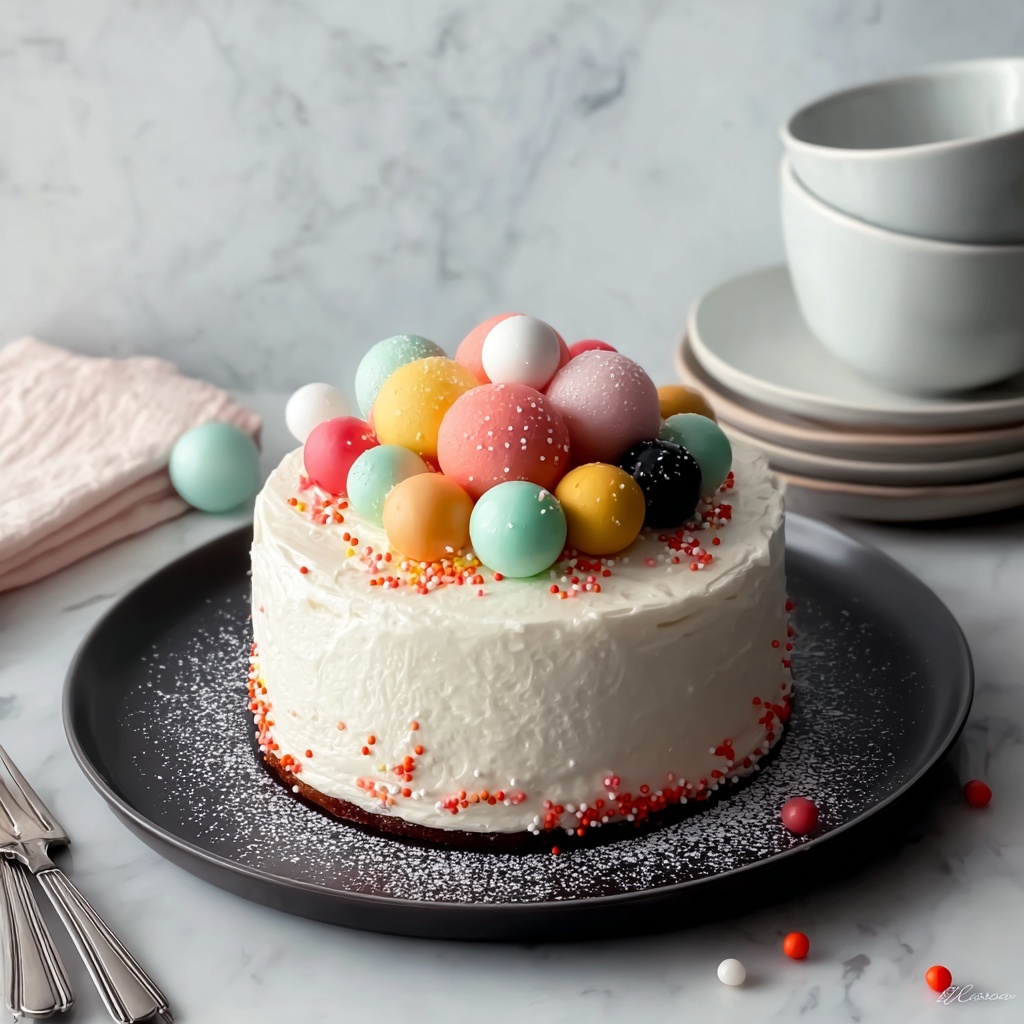
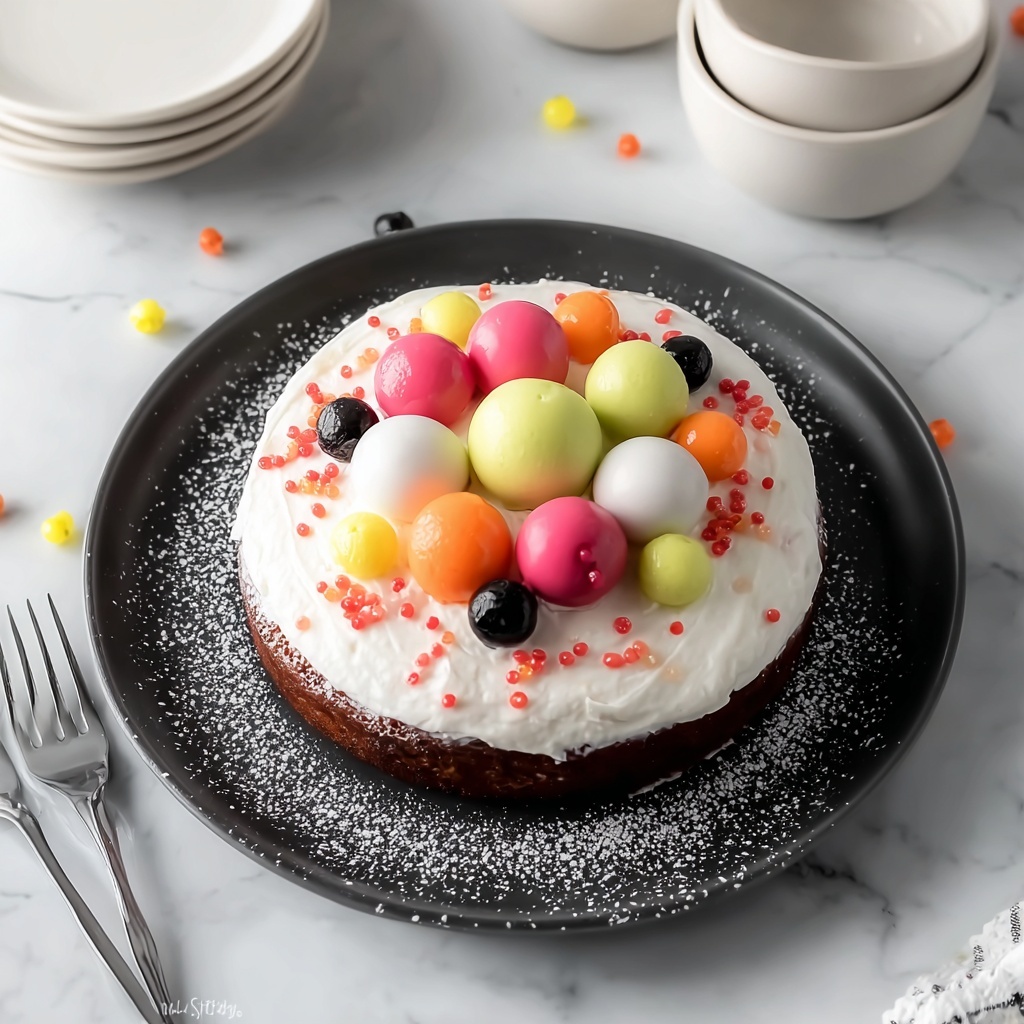
If you are looking for a delightful and charming way to celebrate any special occasion, the Jellycat Birthday Cake Recipe is exactly the treat you need. This cake combines a tender, buttery crumb with a luscious fruit preserve filling and a delicate powdered sugar glaze that adds just the right amount of sweetness and sparkle. Every bite feels like a warm hug, reminding you why homemade cakes have a magic all their own. Whether you’re marking a birthday, an achievement, or simply the joy of gathering with loved ones, this recipe invites you to create moments that taste as wonderful as they feel.
Ingredients You’ll Need
Gathering the ingredients for the Jellycat Birthday Cake Recipe is refreshingly straightforward, yet each component plays a vital role in building its perfect texture, flavor, and character. From the rich butter to the smooth cream and the sweet preserves, every ingredient contributes to a harmonious and mouthwatering experience.
- 2 cups all-purpose flour: Provides the structure and crumb of the cake, ensuring it is tender yet sturdy.
- 1 teaspoon baking powder: A natural leavening agent that helps the cake rise beautifully and get that light lift.
- 1/2 teaspoon salt: Just enough to enhance all the flavors without overpowering sweetness.
- 1/2 cup unsalted butter, softened: Adds richness and moistness for that perfect melt-in-your-mouth texture.
- 1 cup granulated sugar: Sweetens the batter while also contributing to the cake’s tender crumb.
- 3 large eggs: Bind the ingredients, provide moisture, and enrich the flavor.
- 1 teaspoon vanilla extract: A classic flavor enhancer that brings warmth and depth to the cake.
- 1/2 cup whole milk: Moistens the batter and helps create that soft, spongy texture.
- 1/2 cup heavy cream: Adds a luscious creaminess that makes the cake even more indulgent.
- 1/2 cup jelly or fruit preserves: This adds a fruity layer of sweetness and tang, perfectly balancing the cake’s richness.
- 1/2 cup powdered sugar: Used for the glaze, sprinkling a subtle sweetness and a beautiful finishing touch.
How to Make Jellycat Birthday Cake Recipe
Step 1: Prepare Your Oven and Pans
Preheat your oven to 350°F (175°C) to make sure it’s at the perfect temperature for baking. While the oven is warming, grease and flour two 9-inch round cake pans so the delicious cake layers will come out clean and intact.
Step 2: Mix the Dry Ingredients
In a medium-sized bowl, whisk together the all-purpose flour, baking powder, and salt. This step is crucial as it ensures your leavening is evenly distributed and the salt enhances the other flavors in every bite.
Step 3: Cream Butter and Sugar
Using an electric mixer on medium speed, blend the softened unsalted butter and granulated sugar together until the mixture becomes light and fluffy. This process traps air in the batter, creating the cake’s soft and airy texture.
Step 4: Add Eggs and Vanilla
One by one, beat in the eggs, making sure each is fully incorporated before adding the next. Then stir in the vanilla extract, which infuses the batter with its beloved sweet aromatic notes.
Step 5: Combine Wet and Dry Ingredients
Add the flour mixture in three parts, alternating with whole milk and heavy cream—starting and ending with the flour. Mix each addition just until combined, careful not to overwork the batter, so the cake stays tender and moist.
Step 6: Bake the Cake Layers
Divide the batter evenly between the two prepared pans and smooth the tops. Bake for 25 to 30 minutes until the cakes are golden and a toothpick inserted in the center comes out clean. Then let them cool in their pans for 10 minutes before turning out onto a wire rack to cool completely.
Step 7: Assemble and Glaze
Once cooled, spread a thin, even layer of your favorite jelly or fruit preserves on top of one cake layer. Press the second cake on top carefully to adhere. To finish, whisk powdered sugar with a tablespoon of water or milk to create a smooth glaze and pour it over the cake, letting it drip enticingly down the sides.
How to Serve Jellycat Birthday Cake Recipe
Garnishes
To make this cake truly eye-catching, consider topping it with fresh berries, edible flowers, or even a few sprinkles. These little touches brighten the look and add fresh flavors that play wonderfully against the sweet glaze and jelly layers.
Side Dishes
Serve your Jellycat Birthday Cake Recipe alongside a scoop of vanilla ice cream or a dollop of freshly whipped cream for an extra indulgent treat. A cup of fragrant tea or a light coffee pairs beautifully, complementing the cake without overwhelming it.
Creative Ways to Present
Try serving individual slices with small, decorative plates or a drizzle of extra fruit preserves on the side for dipping. For parties, stack mini versions of the Jellycat Birthday Cake Recipe to create a stunning tiered dessert display that will wow your guests.
Make Ahead and Storage
Storing Leftovers
If you have leftovers from your Jellycat Birthday Cake Recipe, store them covered in an airtight container at room temperature for up to two days. This keeps the cake moist without making the glaze sticky or runny.
Freezing
You can freeze the cake layers before assembling by tightly wrapping them in plastic wrap and then foil. Frozen layers last for up to a month and can be thawed overnight in the fridge before continuing with the assembly and glazing steps.
Reheating
Reheating isn’t typically necessary for this cake, but if you prefer it slightly warmed, pop individual slices in the microwave for 10 to 15 seconds. This softens the cake and slightly melts the glaze for a cozy, fresh-from-the-oven taste.
FAQs
Can I use different types of jelly for the Jellycat Birthday Cake Recipe?
Absolutely! The recipe is very versatile, so you can experiment with strawberry, raspberry, apricot, or even mixed berry preserves depending on your taste preference and what’s in season.
Is it possible to make this cake dairy-free?
Yes, you can substitute the butter with a plant-based spread and use your favorite non-dairy milk and cream alternatives like almond or oat milk to make a dairy-free version that still tastes delicious.
How long does the cake stay fresh?
When stored properly in an airtight container, the Jellycat Birthday Cake Recipe stays fresh for about two days at room temperature or up to four days in the fridge.
Can I use a different flour type?
All-purpose flour works best to achieve that perfect balance of crumb and tenderness, but if you need a gluten-free option, look for a one-to-one gluten-free baking flour blend for best results.
What’s the best way to get clean cake layers from the pan?
Greasing the pans well and dusting them with flour helps a lot. Also, allow the cooled cake to loosen around the edges with a knife before flipping it out to prevent any sticking or breakage.
Final Thoughts
There’s something incredibly joyful about baking and sharing a homemade cake, and the Jellycat Birthday Cake Recipe has quickly become a beloved classic for good reason. It’s straightforward to make, uses simple ingredients, and delivers big on flavor and charm every time. I can’t wait for you to try it yourself and see how it transforms your celebrations into heartfelt, memorable feasts full of sweetness and smiles.
Print
Jellycat Birthday Cake Recipe
- Prep Time: 20 minutes
- Cook Time: 30 minutes
- Total Time: 50 minutes
- Yield: 1 two-layer 9-inch round cake (serves about 8-10)
- Category: Dessert
- Method: Baking
- Cuisine: American
Description
A delightful Jellycat Birthday Cake featuring two layers of moist vanilla sponge, layered with sweet fruit preserves and topped with a smooth powdered sugar glaze. Perfect for celebrations, this classic cake balances rich butter and creamy textures with a light, fluffy crumb.
Ingredients
Dry Ingredients
- 2 cups all-purpose flour
- 1 teaspoon baking powder
- 1/2 teaspoon salt
Wet Ingredients
- 1/2 cup unsalted butter, softened
- 1 cup granulated sugar
- 3 large eggs
- 1 teaspoon vanilla extract
- 1/2 cup whole milk
- 1/2 cup heavy cream
Filling and Glaze
- 1/2 cup jelly or fruit preserves
- 1/2 cup powdered sugar
- 1 tablespoon water or milk (for glaze)
Instructions
- Preheat Oven: Preheat your oven to 350°F (175°C) to prepare for baking the cake layers evenly.
- Prepare Pans: Grease and flour two 9-inch round cake pans to prevent sticking and ensure easy cake removal.
- Mix Dry Ingredients: In a medium bowl, whisk together the all-purpose flour, baking powder, and salt thoroughly to distribute the leavening agents evenly.
- Cream Butter and Sugar: In a large mixing bowl, cream the softened unsalted butter and granulated sugar using an electric mixer on medium speed until the mixture is light and fluffy, creating a smooth batter base.
- Add Eggs: Incorporate the eggs one at a time, beating well after each addition to fully combine and maintain the batter’s smooth texture.
- Add Vanilla: Stir in the vanilla extract to infuse the batter with a rich, aromatic flavor.
- Combine Dry and Wet: Gradually add the flour mixture in three parts to the wet ingredients, alternating with whole milk and heavy cream, starting and ending with the flour mixture. Mix gently until just combined to avoid overdeveloping gluten.
- Divide Batter: Evenly divide the batter between the prepared pans and smooth the tops with a spatula for an even bake.
- Bake: Bake in the preheated oven for 25 to 30 minutes, or until a toothpick inserted into the center of the cakes comes out clean, indicating they are fully baked.
- Cool in Pans: Remove cakes from the oven and let them cool in their pans for 10 minutes to set before handling.
- Cool Completely: Turn the cakes out onto a wire rack and allow them to cool completely to room temperature for easier assembly.
- Apply Filling: Spread a thin, even layer of jelly or fruit preserves over the top of one cake layer to add sweetness and moisture.
- Stack Cakes: Place the second cake layer on top of the jelly-topped cake, gently pressing to adhere and form the full cake.
- Make Glaze: In a small bowl, whisk the powdered sugar with a tablespoon of water or milk until smooth to create a delicate glaze glaze.
- Glaze Cake: Pour the glaze over the top of the assembled cake, allowing it to drip down the sides for a decorative and sweet finish.
- Set Glaze: Let the cake sit for 10 minutes so the glaze can set before slicing and serving, ensuring a neat presentation.
Notes
- Use room temperature ingredients to ensure smooth batter integration.
- Do not overmix the batter to keep the cake tender and light.
- For variations, try different flavors of jelly or fruit preserves.
- Allow the glaze to set completely before slicing for a clean cut.
- Store leftover cake in an airtight container at room temperature for up to 2 days or refrigerate for longer freshness.


