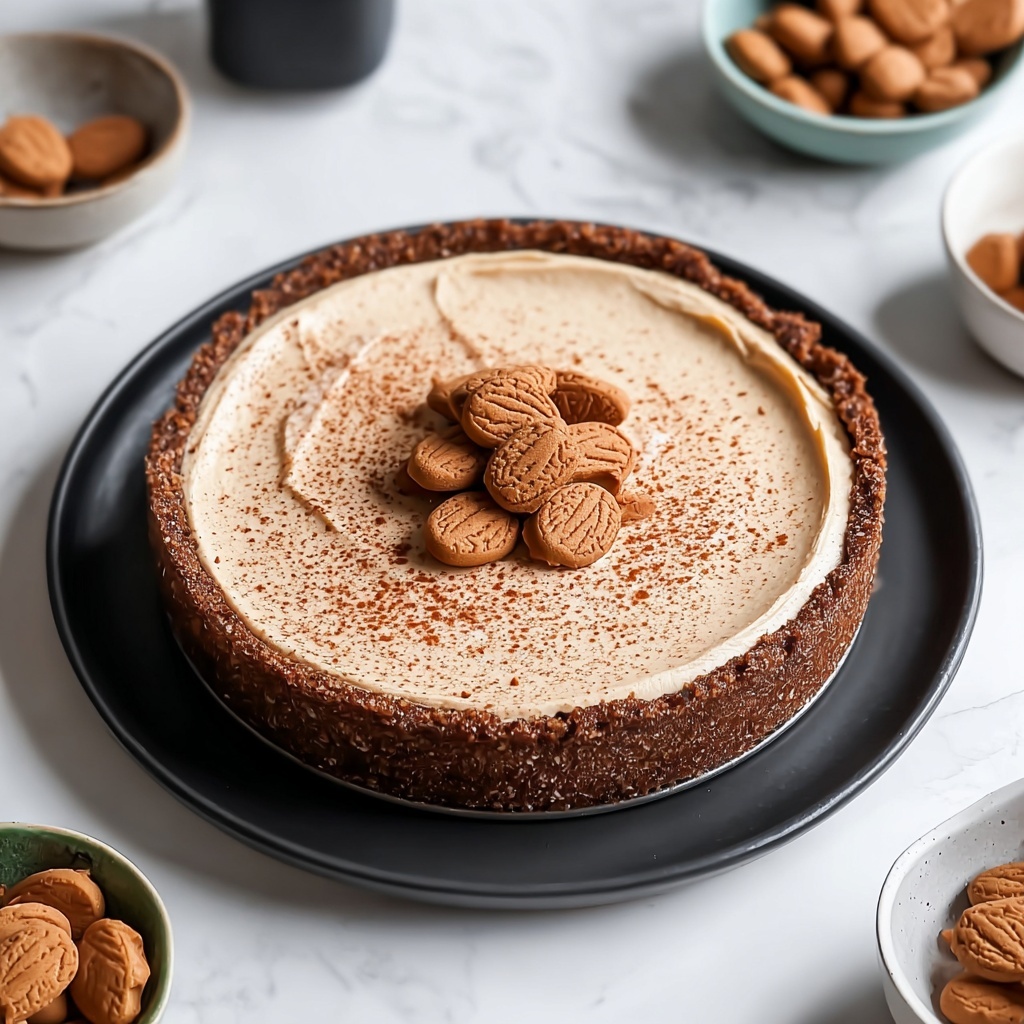
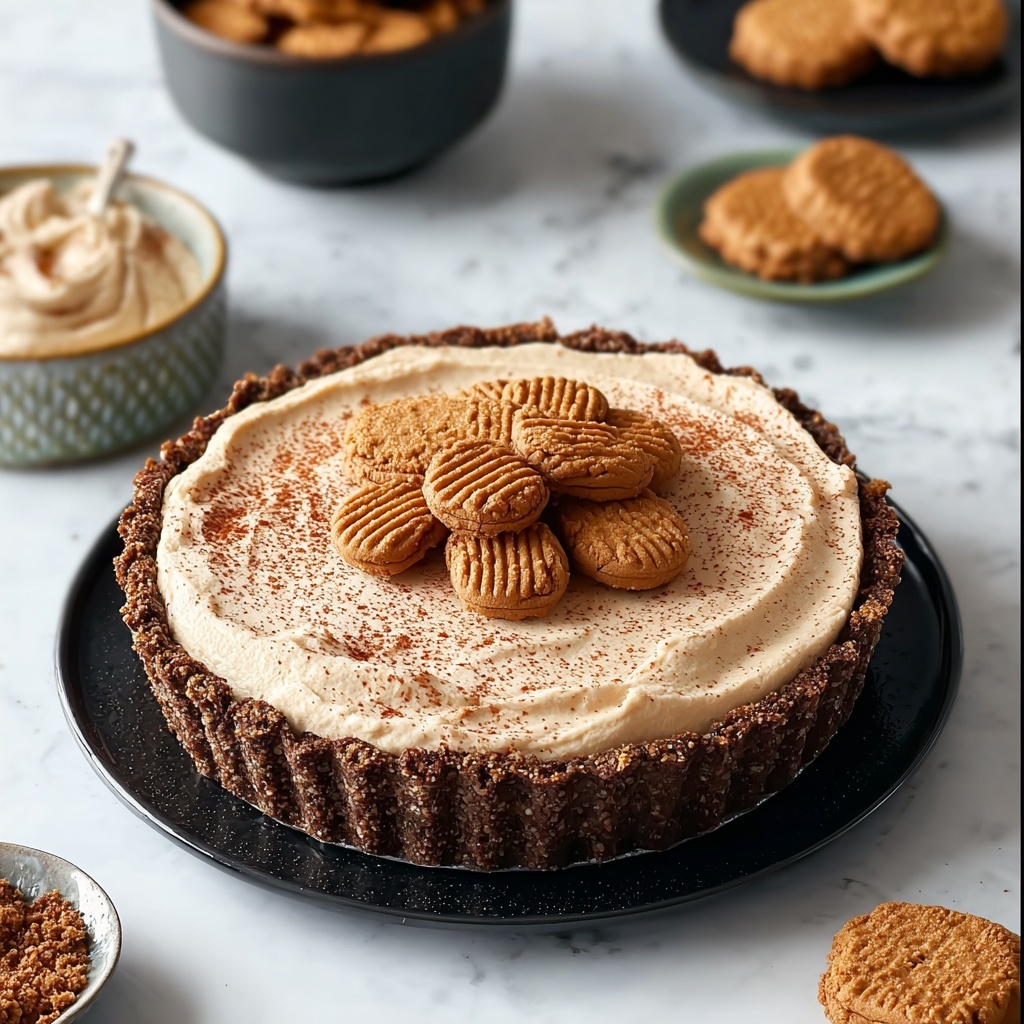
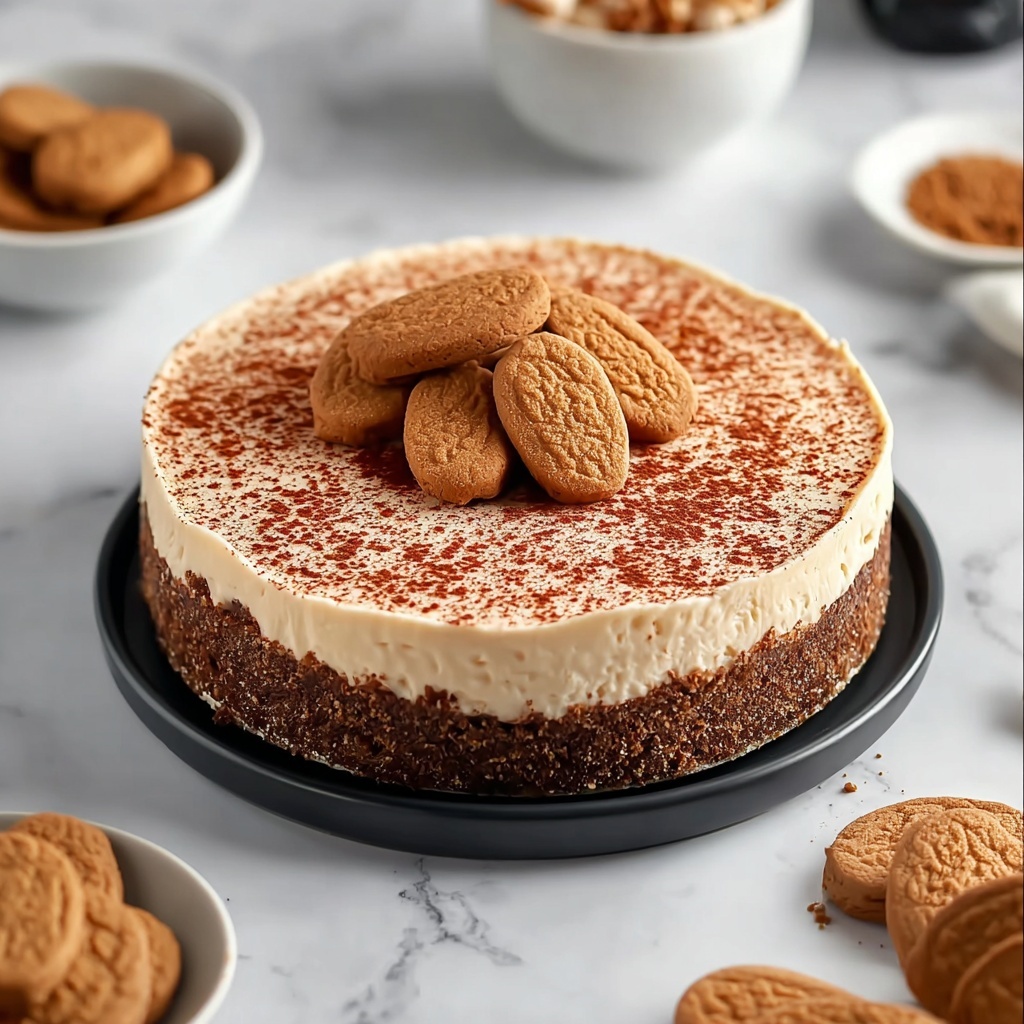
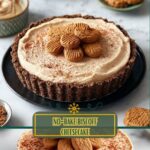
If you have a sweet tooth and a love for creamy desserts, then this No-Bake Lotus Biscoff Cheesecake Recipe is going to be your new obsession. Imagine a luscious, velvety cheesecake that boasts the warm, caramelized spice of Lotus Biscoff cookies and spread, all held together in a perfectly crumbly cookie crust. The best part? You don’t need an oven, just some chill time and a bit of mixing magic. It’s utterly indulgent yet surprisingly simple, making it ideal for impressing guests or treating yourself on any day!
Ingredients You’ll Need
Every ingredient in this recipe plays a starring role in delivering the perfect balance of flavor and texture. From the crisp Lotus Biscoff cookie crust to the creamy, airy filling, these pantry staples come together harmoniously to create that signature cheesecake magic.
- 1 1/2 cups Lotus Biscoff cookies: These spiced caramelized cookies provide a crunchy, flavorful base that’s hard to resist.
- 1/4 cup melted butter: Helps bind the cookie crumbs together to form a firm, buttery crust.
- 2 cups cream cheese: The rich and creamy foundation of the cheesecake filling.
- 1/2 cup powdered sugar: Adds just the right amount of sweetness and helps smooth the cream cheese mixture.
- 1 teaspoon vanilla extract: Brightens and enhances the overall flavor of the cheesecake.
- 1 1/2 cups heavy whipping cream: Whipped to stiff peaks for that irresistible lightness and fluffiness.
- 1/2 cup Lotus Biscoff spread: Infuses the filling with an extra burst of that signature caramel spice taste.
How to Make No-Bake Lotus Biscoff Cheesecake Recipe
Step 1: Prepare the Cookie Base
Start by crushing your Lotus Biscoff cookies until they become fine crumbs that look like sandy sugar. This texture is key to getting a firm yet delicate crust that holds up beautifully.
Step 2: Combine Crumbs and Butter
Mix the cookie crumbs with the melted butter thoroughly. This wet, sandy consistency helps the base stick together once pressed into the pan.
Step 3: Form and Chill the Crust
Press the mixture evenly into the bottom of an 8-inch springform pan. Firm pressure is essential for a solid foundation. Set the crust in the refrigerator while you move on to the filling.
Step 4: Beat the Cream Cheese
Whip the cream cheese until perfectly smooth and free of lumps. This step ensures a creamy and silky filling texture.
Step 5: Sweeten the Cream Cheese
Add powdered sugar to the cream cheese and continue mixing until light and fluffy. This balances richness with a touch of sweetness.
Step 6: Add Vanilla Extract
Incorporate vanilla extract for an aromatic hint that ties all flavors together harmoniously.
Step 7: Whip the Heavy Cream
Beat your heavy whipping cream until stiff peaks form. Achieving the right peaks here adds essential airiness to the cheesecake’s texture.
Step 8: Fold Whipped Cream Into Cream Cheese Mixture
Gently fold the whipped cream into the creamy cheese mixture. It’s important to fold carefully so all that lovely fluffiness stays intact.
Step 9: Blend in Lotus Biscoff Spread
Add the Lotus Biscoff spread and fold it evenly through the filling, infusing every bite with a rich caramel flavor that’s unmistakably Biscoff.
Step 10: Assemble the Cheesecake
Pour the luscious filling over your chilled crust and smooth it out with a spatula for an even top.
Step 11: Chill to Set
Refrigerate the cheesecake for at least four hours, though overnight is best to let it fully firm up and the flavors meld beautifully.
Step 12: Remove From Pan
Once set, carefully unlatch and remove the springform. Your cheesecake is now ready for the final touches.
Step 13: Optional Garnishing
Add some extra crushed Lotus Biscoff cookies or drizzle Lotus Biscoff spread on top for an elegant and tasty finish.
Step 14: Serve and Enjoy
Slice your beautifully chilled cake and serve it immediately. It’s ready to wow anyone lucky enough to get a taste.
How to Serve No-Bake Lotus Biscoff Cheesecake Recipe
Garnishes
Enhance the visual appeal and texture by sprinkling crushed Lotus Biscoff cookies or swirling some additional Biscoff spread on top. A light dusting of cinnamon or a few toasted nuts can also add a lovely extra touch.
Side Dishes
Pair this cheesecake with fresh berries or a tangy fruit compote to balance the richness. A hot cup of coffee or tea also complements the caramel spice notes perfectly.
Creative Ways to Present
For a special occasion, serve individual cheesecake jars layered with cookie crumbs and whipped cream, or make bite-sized cheesecake bars for easy sharing. Presentation is all about making it inviting and as irresistible as the flavors.
Make Ahead and Storage
Storing Leftovers
Store leftover cheesecake tightly covered in the refrigerator to preserve its creamy texture and keep it fresh. It will stay delicious for up to 3-4 days.
Freezing
You can freeze this cheesecake for longer storage. Wrap it well in plastic wrap and foil before freezing. Thaw it overnight in the fridge before serving to maintain its texture.
Reheating
This cheesecake is best enjoyed chilled, so no reheating is necessary or recommended. Just let it sit at room temperature for a few minutes if it’s too cold straight from the fridge to bring out the flavors beautifully.
FAQs
Can I use a different type of cookie for the crust?
Absolutely! While Lotus Biscoff cookies give a unique caramel spice flavor, you can swap in graham crackers or speculoos if needed. Just keep in mind the flavor profile will change.
Is it possible to make this cheesecake vegan?
A vegan version would require using plant-based cream cheese, whipped coconut cream, and a vegan cookie base. The Lotus Biscoff cookies are typically vegan, but double-check the label to be sure.
Can I make this recipe without a springform pan?
Yes, you can use any cake pan with removable sides or even a regular pan lined with parchment paper for easy removal. Just be careful when slicing.
How long does the cheesecake need to chill before serving?
At least four hours of chilling is necessary to allow the cheesecake to set properly, but refrigerating overnight is ideal for the best texture and flavor development.
Will the cheesecake be very sweet?
This cheesecake has a balanced sweetness thanks to the powdered sugar and caramel notes of the Biscoff. You can always adjust the powdered sugar slightly to suit your taste.
Final Thoughts
I genuinely hope you give this No-Bake Lotus Biscoff Cheesecake Recipe a try because it’s one of those recipes that’s simple, stunning, and downright delicious every single time. It’s a fantastic treat to keep on hand when you want to impress without the fuss of baking, and it truly tastes like love in dessert form. Happy cheesecaking!
Print
No-Bake Lotus Biscoff Cheesecake Recipe
- Prep Time: 0h 20m
- Cook Time: 0h 0m
- Total Time: 4h 20m
- Yield: 8 servings
- Category: Dessert
- Method: No-Cook
- Cuisine: American
Description
This no-bake Lotus Biscoff cheesecake is a creamy, indulgent dessert featuring a crunchy Biscoff cookie crust combined with a smooth, spiced cheesecake filling enriched with Lotus Biscoff spread. Easy to prepare and requiring no oven time, it is perfect for a quick yet elegant treat to impress guests or satisfy your sweet tooth.
Ingredients
Base
- 1 1/2 cups Lotus Biscoff cookies
- 1/4 cup melted butter
Filling
- 2 cups cream cheese
- 1/2 cup powdered sugar
- 1 teaspoon vanilla extract
- 1 1/2 cups heavy whipping cream
- 1/2 cup Lotus Biscoff spread
Instructions
- Prepare the base: Begin by crushing the Lotus Biscoff cookies using a food processor or by placing them in a sealed plastic bag and crushing them until finely ground, resembling sand.
- Mix base ingredients: Transfer the crushed cookies into a mixing bowl and add the melted butter. Stir thoroughly until the mixture has a wet, sandy texture.
- Form crust: Press the cookie-butter mixture evenly into the base of an 8-inch springform pan, compacting it firmly with a spoon or your fingers. Refrigerate the crust while preparing the filling.
- Beat cream cheese: In a large bowl, beat the cream cheese on medium speed with a hand or stand mixer until smooth and creamy, about 2-3 minutes.
- Add powdered sugar: Add powdered sugar to the cream cheese and continue mixing for 1-2 minutes until fully incorporated and light.
- Mix in vanilla extract: Beat in the vanilla extract for a few seconds to combine.
- Whip cream: In a separate bowl, whip the heavy cream on high speed until stiff peaks form, about 3-5 minutes.
- Fold whipped cream: Gently fold the whipped cream into the cream cheese mixture using a spatula, ensuring no streaks remain to keep the filling light and airy.
- Incorporate Biscoff spread: Fold in the Lotus Biscoff spread evenly for a smooth, caramel-flavored filling.
- Assemble cheesecake: Remove the chilled crust from the fridge and spoon the filling onto it, spreading evenly with a spatula to level the top.
- Chill to set: Refrigerate the assembled cheesecake for at least 4 hours or overnight to firm up and develop flavor.
- Remove from pan: Carefully take the cheesecake out of the springform pan and place it on a serving platter.
- Optional garnish: Garnish with extra crushed Lotus Biscoff cookies or drizzles of Lotus Biscoff spread for decoration and added flavor.
- Serve: Slice the cheesecake and serve chilled for the best texture and taste.
Notes
- Ensure the cream cheese is at room temperature before mixing for a smoother filling.
- Using an 8-inch springform pan will give the best crust to filling ratio.
- For best results, chill the cheesecake overnight.
- You can substitute heavy whipping cream with a dairy-free alternative if desired, but texture may vary.
- The cheesecake is best served chilled and can be stored in the refrigerator for up to 3 days.


