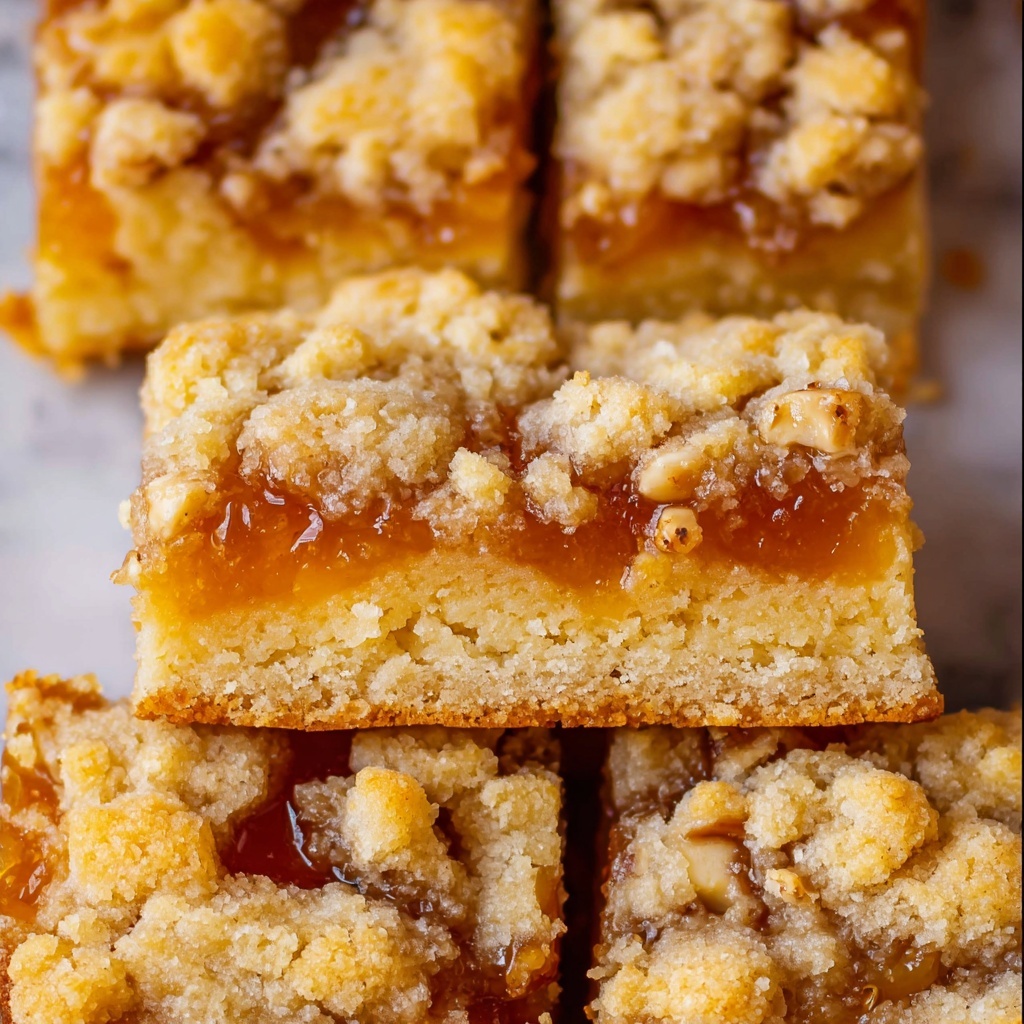
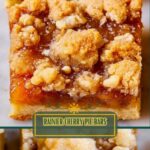
If you are searching for a delightful twist on classic cherry desserts, this Rainier Cherry Pie Bars Recipe is an absolute game changer. Imagine a buttery, flaky shortbread crust layered with luscious, vibrant Rainier cherries, their unique sweetness shining through each bite. The addition of toasted walnuts adds a satisfying crunch, balancing the soft cherry filling perfectly. These bars are ideal for sharing at gatherings or treating yourself to a decadent snack that tastes like summer in every forkful. Trust me, once you make these bars, they will quickly become a cherished favorite in your baking repertoire.
Ingredients You’ll Need
The beauty of this Rainier Cherry Pie Bars Recipe lies in its simplicity. Each ingredient plays a key role in creating a delightful blend of textures and flavors that come together flawlessly.
- 2 cups butter (softened): Provides richness and helps create a tender, flaky shortbread crust.
- 1 cup granulated sugar: Sweetens the crust and enhances the cherries’ natural flavor.
- 1 teaspoon vanilla extract: Adds warm, comforting notes to the dough.
- 1 teaspoon almond extract: Perfectly complements the cherries with a subtle nutty aroma.
- 1 & 1/2 teaspoons kosher salt: Balances sweetness and highlights other flavors.
- 4 cups flour (spooned and leveled): The sturdy base for the crust, ensuring structure without toughness.
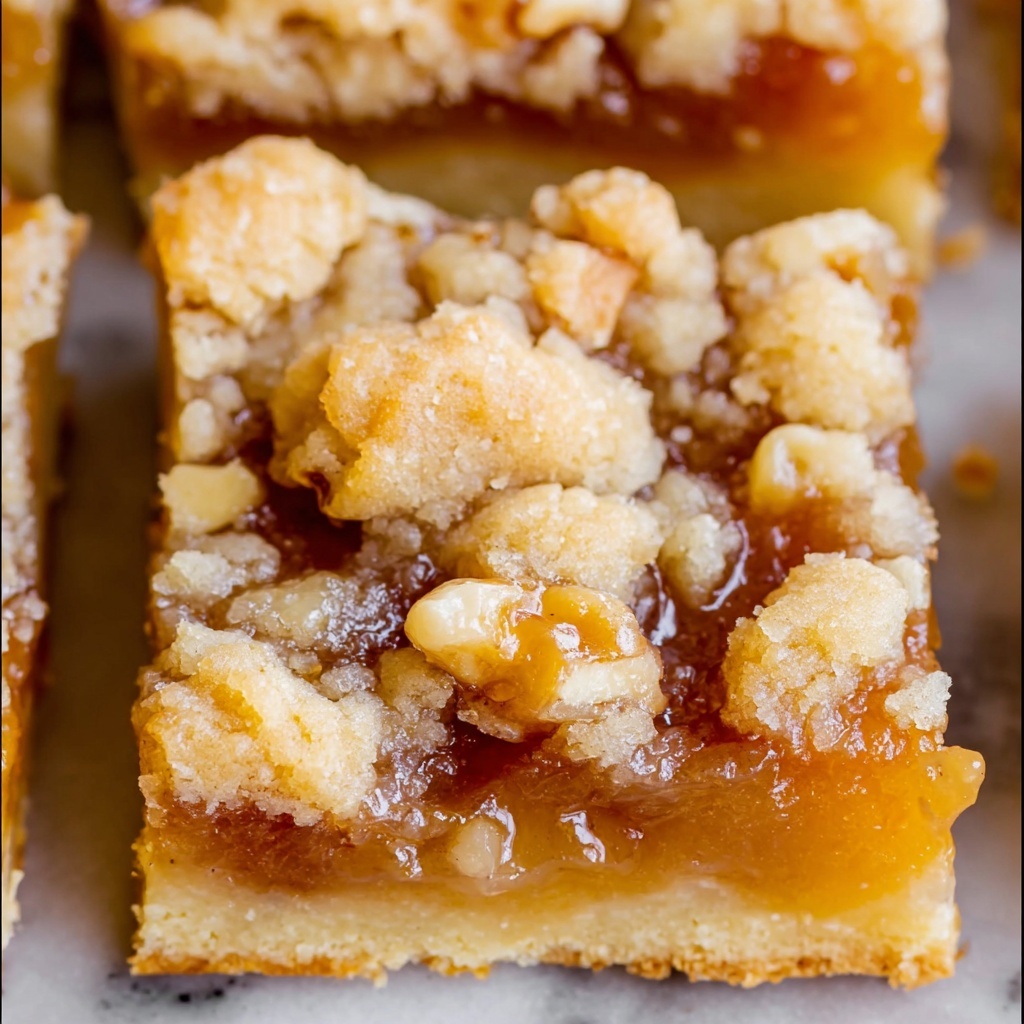
- 1/2 cup toasted walnuts (chopped): Adds a delightful crunch and depth to the bars.
- 2 & 1/2 pounds Rainier cherries (pitted, about 8 cups): Juicy, sweet cherries that give the filling its signature bright color and flavor.
- 1 & 1/4 cups granulated sugar: Sweetens the cherry filling just right.
- 1/4 cup fresh lemon juice: Balances sweetness with fresh acidity to brighten the cherry filling.
- 1 & 1/2 tablespoons cornstarch: Thickens the cherry filling for perfect sliceability.
- 1/4 teaspoon kosher salt: Enhances flavor depth within the filling.
How to Make Rainier Cherry Pie Bars Recipe
Step 1: Toast the Walnuts
Start by waking up the walnuts’ flavor with a quick toast in your oven preheated to 375 degrees Fahrenheit. Spreading them on a dry pan and stirring every few minutes releases their oils, making them irresistibly fragrant and crunchy. This little step boosts the texture and taste, so don’t skip it!
Step 2: Prepare Your Pan
Line a 9×13 inch pan with parchment paper or generously grease it. This ensures your bars will come out smoothly after baking, preserving their beautiful shape and making cutting much easier.
Step 3: Make the Shortbread Dough
In a large bowl or your stand mixer, beat softened butter until perfectly smooth. Then, add sugar and continue mixing until the mixture is light and fluffy—the secret to a soft, tender crust.
Step 4: Add Flavorings and Flour
Blend in vanilla and almond extracts along with kosher salt for that amazing aroma and savory balance. Then incorporate the flour gradually, beating after each addition. Scrape the bowl often so everything gets fully incorporated. The dough will be a little crumbly but perfect for pressing into your pan.
Step 5: Form and Chill the Base
Divide the dough with about two-thirds going into your pan. Press it firmly to create an even bottom crust. The remaining dough will become the topping after mixing in the toasted walnuts. Chill the crust in the fridge for 20 minutes—this helps it bake up beautifully flaky.
Step 6: Bake the Shortbread Crust
Slide your pan into the hot oven and bake for about 18 to 20 minutes until the edges turn golden and the surface loses shine. Keep an eye on it—this crust will serve as the perfect foundation for all those juicy cherries.
Step 7: Prepare the Cherry Filling
While the crust cools, pit the fresh Rainier cherries (no need to halve them) and toss them in a pot with sugar, lemon juice, cornstarch, and salt. Bring to a boil, then simmer to thicken and soften the cherries into an irresistible filling that glistens with natural juices.
Step 8: Assemble the Bars
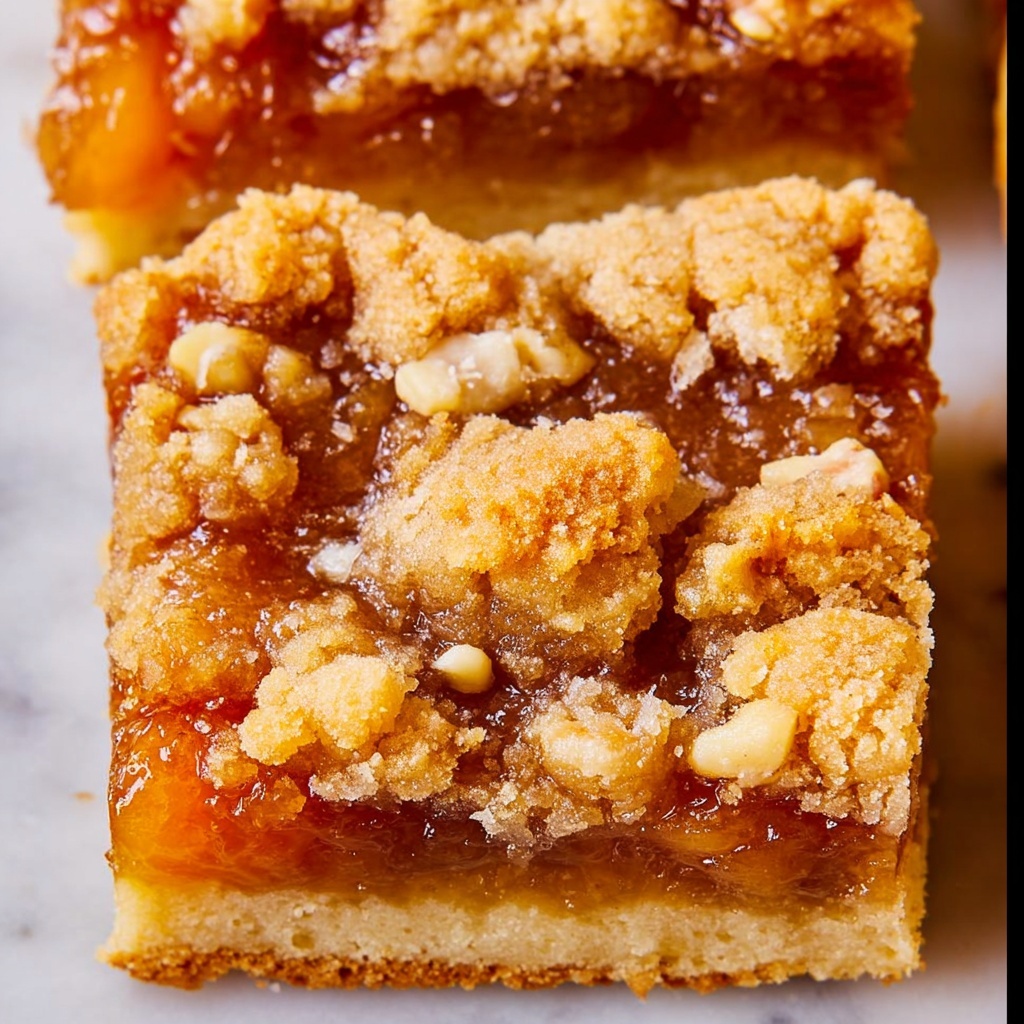
Pour the hot cherry mixture over the baked shortbread base. Quickly break up the remaining dough mixed with walnuts into pieces about the size of quarters and scatter over the cherries. This rustic topping gives you a peek at the glistening cherry layer beneath, making the bars as pretty as they are delicious.
Step 9: Final Bake
Bake the assembled bars at a slightly lower temperature of 350 degrees Fahrenheit for 25 to 30 minutes. Wait for the topping to turn a light, golden brown—the sign that everything is perfectly cooked and ready.
Step 10: Cool and Enjoy
Let the bars cool completely on a wire rack so the filling can set nicely. If you’re impatient like me, pop them in the fridge or freezer to speed things up! Whether warm or cold, these bars taste heavenly, especially paired with vanilla ice cream.
How to Serve Rainier Cherry Pie Bars Recipe
Garnishes
A sprinkle of powdered sugar over the top adds a touch of elegance and extra sweetness. For a little extra crunch, try dusting with some demerara sugar before baking. Fresh mint leaves or a dollop of whipped cream can make the presentation feel festive and inviting.
Side Dishes
These bars are delicious on their own but pair beautifully with a scoop of vanilla or almond-flavored ice cream to complement the nutty notes. A hot cup of coffee or a refreshing glass of lemonade is a perfect companion, balancing the richness of the pie bars.
Creative Ways to Present
For parties, cut the bars into small squares and arrange them on a pretty platter with fresh cherries and walnut halves scattered around. You can even layer them with whipped cream and extra cherries for a gorgeous dessert trifle variation. These bars are versatile enough to delight any crowd!
Make Ahead and Storage
Storing Leftovers
Keep your leftover Rainier Cherry Pie Bars tightly covered at room temperature for up to two days or in the fridge for up to five. This keeps the crust crisp and the filling fresh without losing flavor or texture.
Freezing
If you need to make these ahead of time, freeze the baked bars in an airtight container for up to three months. Thaw them in the fridge overnight for easy enjoyment later. The flavors and texture hold up wonderfully after freezing.
Reheating
Warm individual bars in the microwave for 15 to 20 seconds or reheat in a low oven to bring back that fresh-baked warmth. Serve with ice cream or whipped cream for a comforting and indulgent treat.
FAQs
Can I use frozen Rainier cherries for this recipe?
While fresh cherries are ideal for the best texture and flavor, frozen Rainier cherries can work in a pinch. Just make sure to thaw and drain them well to avoid excess liquid in the filling.
What if I don’t like walnuts?
You can omit the walnuts entirely or substitute with another nut like pecans or almonds. The bars will still be delicious, though the walnuts do add a special crunchy contrast to the creamy cherries.
Can I make these bars gluten-free?
Yes! Swap the all-purpose flour for a gluten-free flour blend that measures cup-for-cup. Be sure to choose one that contains xanthan gum for the best texture.
How long do these bars keep fresh?
Stored properly in the fridge, these Cherry Pie Bars last about 5 days. Their flavor and texture tend to be best within the first couple of days.
What is the best way to pit cherries without a cherry pitter?
If you don’t have a cherry pitter, a metal straw or the edge of a chopstick works well to push the pit out from the stem end. It takes a bit of practice but is surprisingly effective!
Final Thoughts
This Rainier Cherry Pie Bars Recipe is a fantastic way to celebrate the bright, delicate sweetness of Rainier cherries in a form that’s both approachable and utterly scrumptious. With buttery shortbread, juicy fruit filling, and crunchy walnuts, every bite is pure bliss. I hope you enjoy baking and sharing these bars as much as I do, making them a warm and welcome treat in your home.
Print
Rainier Cherry Pie Bars Recipe
- Prep Time: 45 minutes
- Cook Time: 30 minutes
- Total Time: 1 hour 15 minutes
- Yield: 16 bars
- Category: Dessert
- Method: Baking
- Cuisine: American
Description
Delightful Rainier Cherry Pie Bars featuring a buttery shortbread crust, toasted walnuts, and a luscious cherry filling made from fresh Rainier cherries. Perfectly balanced with almond and vanilla extracts, these bars offer a mix of flaky texture and sweet-tart fruitiness for an irresistible dessert.
Ingredients
Shortbread Crust
- 2 cups butter (softened, 4 sticks)
- 1 cup granulated sugar
- 1 teaspoon vanilla extract
- 1 teaspoon almond extract
- 1 & 1/2 teaspoons kosher salt
- 4 cups flour (spooned and leveled)
Walnuts
- 1/2 cup toasted walnuts (chopped)
Cherry Filling
- 2 & 1/2 pounds Rainier cherries (pitted, about 8 cups cherries)
- 1 & 1/4 cups granulated sugar
- 1/4 cup fresh lemon juice (from 1 large lemon)
- 1 & 1/2 tablespoons cornstarch
- 1/4 teaspoon kosher salt
Instructions
- Toast walnuts: Preheat oven to 375°F. Spread 1/2 cup chopped walnuts on a dry baking sheet. Bake for 5 minutes, stir, then bake in 2-minute increments stirring each time until nuts are browned and fragrant. Remove and let cool.
- Prepare pan: Line a 9×13 inch pan with parchment paper or grease with nonstick spray or butter. Set aside.
- Make shortbread dough – Butter base: In a large bowl or stand mixer, beat 2 cups softened butter until smooth and lump-free, scraping sides and bottom as needed.
- Add sugar: Add 1 cup granulated sugar and beat for 2 minutes until butter is light and fluffy.
- Incorporate extracts and salt: Add 1 teaspoon vanilla extract, 1 teaspoon almond extract, and 1 & 1/2 teaspoons kosher salt. Beat to combine.
- Add flour: Add 1 cup flour, beat until combined. Continue adding remaining flour 1 cup at a time (total 4 cups), beating and scraping bowl each addition. Mix last parts manually if needed.
- Form crust base: Use about 2/3 of the dough and press evenly into bottom of prepared pan with wet hands to prevent sticking. Chill crust in fridge for 20 minutes for flaky texture.
- Mix walnuts into remaining dough: Add cooled toasted walnuts to remaining dough, mix well, and chill in refrigerator while crust bakes.
- Bake crust: Bake the chilled crust at 375°F for 18-20 minutes, until edges are golden and center is no longer shiny. Let cool.
- Lower oven temp: Reduce oven temperature to 350°F.
- Prep cherries: Pit cherries using a cherry pitter or a metal straw, leaving cherries whole. Place in a 3-quart pot.
- Make cherry filling: Add 1 & 1/4 cups sugar, 1/4 cup lemon juice, 1 & 1/2 tablespoons cornstarch, and 1/4 teaspoon kosher salt to cherries. Stir to combine.
- Cook filling: Bring mixture to a boil over high heat. Then reduce to medium or medium-high to keep a strong simmer. Boil for 5-6 minutes, stirring occasionally, until cherries soften and mixture thickens and foams.
- Assemble bars: Pour hot cherry filling over baked crust in pan.
- Add walnut shortbread topping: Quickly scatter the remaining walnut dough in small quarter-sized pieces over cherries to cover. Optionally sprinkle 1-2 tablespoons demerara sugar for extra crunch.
- Bake assembled bars: Bake at 350°F for 25-30 minutes until topping is lightly browned.
- Cool and serve: Remove bars from oven and cool completely on wire rack. Optionally chill in fridge or freezer to speed cooling. Bars can be enjoyed warm with vanilla ice cream or cooled and sliced.
Notes
- Using cold dough for the crust before baking yields a flaky texture.
- Toasting walnuts enhances their flavor and adds crunch.
- Be sure to use a metal straw or cherry pitter for easy pitting without halving cherries.
- Sprinkling demerara sugar on the topping is optional for added texture.
- Bars can be served warm or fully cooled; warm bars are delicious with ice cream but can be messy.


