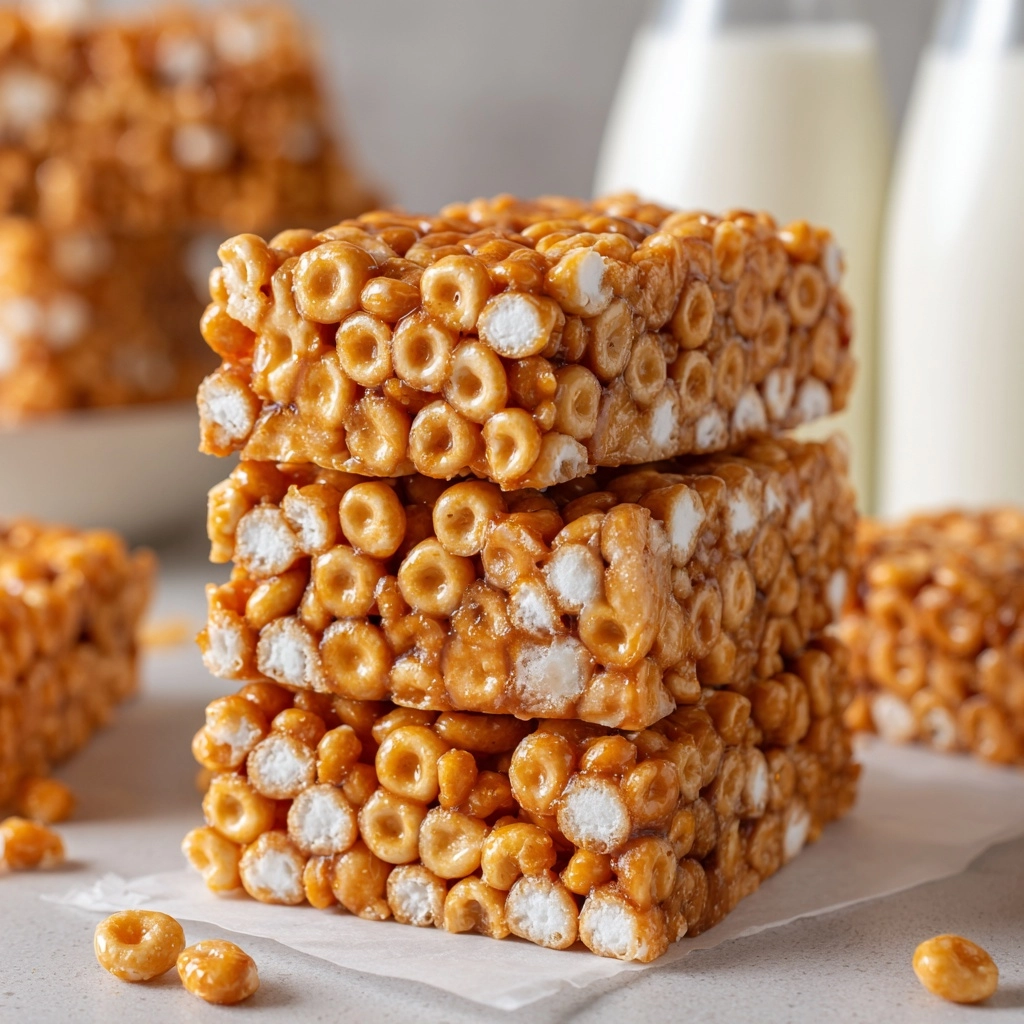
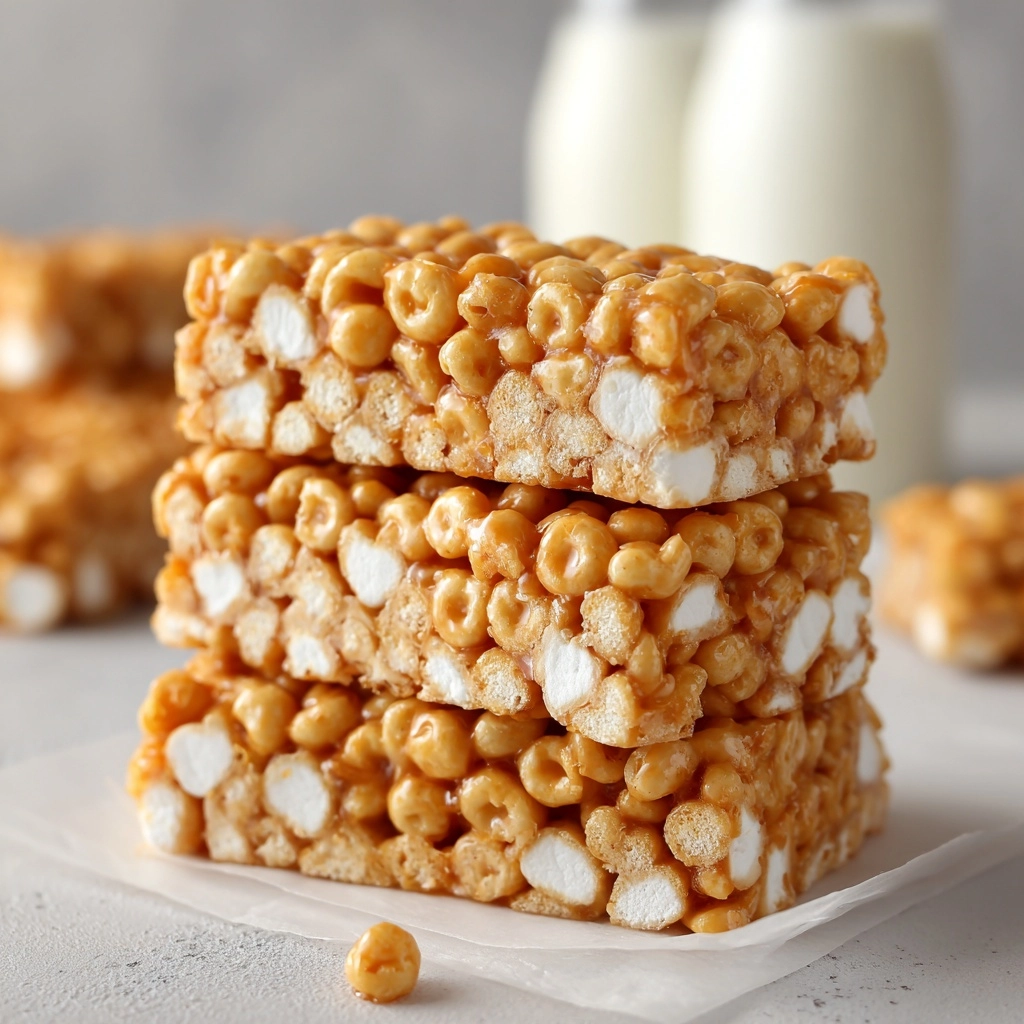
If you’re on the lookout for a snack that’s both energizing and downright delicious, this Cereal Bars Recipe is going to become your new best friend. Picture crispy rice cereal and hearty oats brought together in a no-bake treat that’s perfectly chewy, slightly sweet, and totally satisfying. Whether you need a quick bite between meals or a wholesome lunchbox addition, these bars check all the boxes with simple ingredients that reward you with layers of texture and flavor. Trust me, making your own cereal bars at home is not only rewarding but also lets you customize every bite to your liking!
Ingredients You’ll Need
To make the perfect cereal bars, you only need a handful of pantry staples, each playing a crucial role in flavor, texture, and that irresistible chewiness. These ingredients come together simply yet create a snack that feels anything but basic.
- 3 cups crispy rice cereal: Adds a light crunch and classic texture to the bars.
- 1 ½ cups old-fashioned oats: Brings wholesome, hearty chewiness and boosts nutrition.
- ½ cup honey: Acts as the natural sweetener and glue holding everything together.
- ½ cup peanut butter (or almond butter): Adds creaminess and a rich, nutty flavor.
- ¼ cup brown sugar: Deepens sweetness with a hint of molasses that complements honey.
- 1 teaspoon vanilla extract: Infuses warmth and enhances all the other flavors.
- ¼ teaspoon salt: Balances sweetness, making the flavors pop.
- ½ cup mini chocolate chips (optional): Provides little bursts of chocolatey goodness throughout.
- ¼ cup chopped nuts or dried fruit (optional): Adds texture and a personalized twist.
How to Make Cereal Bars Recipe
Step 1: Prepare Your Pan
Start by lining an 8×8 or 9×9-inch baking pan with parchment paper, making sure to create an overhang for easy lifting later. This small step will save you from sticky fingers and messy cleanup, making removal of your bars effortless.
Step 2: Combine Dry Ingredients
In a large mixing bowl, pour in the crispy rice cereal and old-fashioned oats. Stir them gently together so that every bite has a perfect balance of crunch and chew.
Step 3: Make the Binding Mixture
In a small saucepan over medium heat, combine honey, peanut butter, and brown sugar. Stir constantly to blend everything smoothly and prevent burning. Once the mixture just begins to bubble after about 2 to 3 minutes, remove it from heat to avoid overcooking, which could affect texture.
Step 4: Flavor Boost
While the mixture is still warm but off the stove, stir in vanilla extract and salt. These two simple additions really lift the flavor profile, making your bars taste homemade and cozy.
Step 5: Combine Wet and Dry
Pour the warm wet mixture over your bowl of dry ingredients. Stir thoroughly until every bit is coated, ensuring your bars will hold together firmly once chilled.
Step 6: Add the Fun Extras
Let the mixture cool just a bit, then fold in chocolate chips, nuts, or dried fruit if you’re including them. This is your chance to customize and make the recipe all your own.
Step 7: Press and Chill
Transfer everything to your prepared pan. Press the mixture firmly and evenly using a spatula or the back of a measure cup. Tightly packed bars hold better and slice nicely. Refrigerate for at least one hour so they can set properly.
Step 8: Slice and Enjoy
Once chilled and firm, lift out the cereal bars using the parchment overhang and cut them into squares or bars. Now they’re ready to snack on, share, or pack for later!
How to Serve Cereal Bars Recipe

Garnishes
If you want to add a touch of elegance or extra flavor, sprinkle a few sea salt flakes or drizzle some melted dark chocolate on top before chilling. Toasted coconut flakes or a dusting of cinnamon can also bring a fresh twist that elevates your cereal bars.
Side Dishes
These bars pair excellently with a cup of your favorite tea or coffee, making for an energizing morning start or afternoon pick-me-up. If serving for kids, a side of fresh fruit or yogurt complements the bars nicely for balanced nutrition.
Creative Ways to Present
For parties or packed lunches, wrap individual bars in parchment paper tied with twine or place them in decorative boxes. You can also layer them with slices of fresh fruit in a bento box to add a burst of color and freshness to the snack time.
Make Ahead and Storage
Storing Leftovers
Store your cereal bars in an airtight container at room temperature to keep them chewy and fresh for up to 5 days. This makes them perfect for preparing in advance and grabbing on the go.
Freezing
Want to enjoy your bars beyond the week? Freeze them individually wrapped in parchment paper and placed in a freezer-safe bag. They’ll stay great for up to 2 months, so you can always have a homemade snack waiting for you.
Reheating
Though these cereal bars are delicious straight from the fridge or freezer, you can warm one up for 10 to 15 seconds in the microwave for a softer, melt-in-your-mouth treat. Just be careful not to overheat and make them too sticky.
FAQs
Can I make the cereal bars nut-free?
Absolutely! Simply substitute peanut or almond butter with sunflower seed butter or any other nut-free alternative. This tweak keeps the bars safe for those with nut allergies while maintaining delicious flavor.
Is this Cereal Bars Recipe vegan-friendly?
Yes, by swapping honey for maple syrup and using dairy-free chocolate chips, you can easily make this recipe vegan. It’s a wonderful way to enjoy a wholesome snack that fits your dietary preferences.
Can I add other mix-ins besides chocolate chips and nuts?
Definitely! Feel free to incorporate shredded coconut, flaxseeds, chia seeds, or dried cranberries to boost both flavor and nutrition. These additions personalize the bars exactly to your taste.
How do I keep the bars from falling apart?
The key is to press the mixture down firmly into the pan and refrigerate until fully set. Make sure the wet mixture evenly coats the dry ingredients for proper binding, which ensures sturdy bars.
What is the best way to cut the bars?
Use a sharp knife or a pizza cutter and cut the bars once they’ve fully chilled. For cleaner cuts, warm the knife slightly by running it under hot water and drying it before slicing. This prevents crumbling.
Final Thoughts
This Cereal Bars Recipe is truly a game-changer for anyone craving a no-fuss, homemade snack that feels indulgent but is made from simple, wholesome ingredients. I recommend giving it a try soon—you’ll love how customizable and satisfying these bars are, perfect for any time of day. Happy snacking!
Print
Cereal Bars Recipe
- Prep Time: 10 minutes
- Cook Time: 5 minutes
- Total Time: 1 hour 15 minutes
- Yield: 12 bars
- Category: Snack
- Method: No-Bake
- Cuisine: American
- Diet: Vegetarian
Description
These delicious and easy-to-make cereal bars combine crispy rice cereal, oats, and a sticky blend of honey and peanut butter for a perfect no-bake snack. Ideal for a quick energy boost or a healthy treat, these bars can be customized with chocolate chips, nuts, or dried fruit to suit your taste.
Ingredients
Dry Ingredients
- 3 cups crispy rice cereal
- 1 ½ cups old-fashioned oats
- ¼ teaspoon salt
- ½ cup mini chocolate chips (optional)
- ¼ cup chopped nuts or dried fruit (optional)
Wet Ingredients
- ½ cup honey
- ½ cup peanut butter (or almond butter)
- ¼ cup brown sugar
- 1 teaspoon vanilla extract
Instructions
- Prepare Pan: Line an 8×8-inch or 9×9-inch baking pan with parchment paper, leaving an overhang for easy removal of the bars later.
- Mix Dry Ingredients: In a large mixing bowl, combine the crispy rice cereal, old-fashioned oats, and salt, ensuring even distribution.
- Heat Wet Ingredients: In a small saucepan over medium heat, combine honey, peanut butter, and brown sugar. Stir constantly until the mixture is smooth and just starts to bubble, which takes about 2–3 minutes.
- Add Flavorings: Remove the saucepan from heat, then stir in the vanilla extract and salt until fully incorporated.
- Combine Mixtures: Pour the warm wet mixture over the dry ingredients. Stir thoroughly until everything is fully coated and combined.
- Optional Add-ins: Let the mixture cool slightly, then gently fold in the mini chocolate chips, chopped nuts, or dried fruit, if using, for added flavor and texture.
- Press into Pan: Firmly and evenly press the mixture into the prepared pan using a spatula or the back of a measuring cup to compact it tightly.
- Chill: Refrigerate the pan for at least 1 hour or until the bars are set and firm.
- Cut and Store: Lift the set mixture out of the pan using the parchment overhang and cut it into 12 bars or squares. Store the bars in an airtight container at room temperature for up to 5 days or refrigerate to extend shelf life.
Notes
- To make the bars nut-free, substitute peanut butter with sunflower seed butter or a similar nut-free alternative.
- For a vegan version, replace honey with maple syrup and ensure the chocolate chips are dairy-free.
- Enhance nutrition by adding shredded coconut, flaxseeds, or chia seeds into the mixture.


