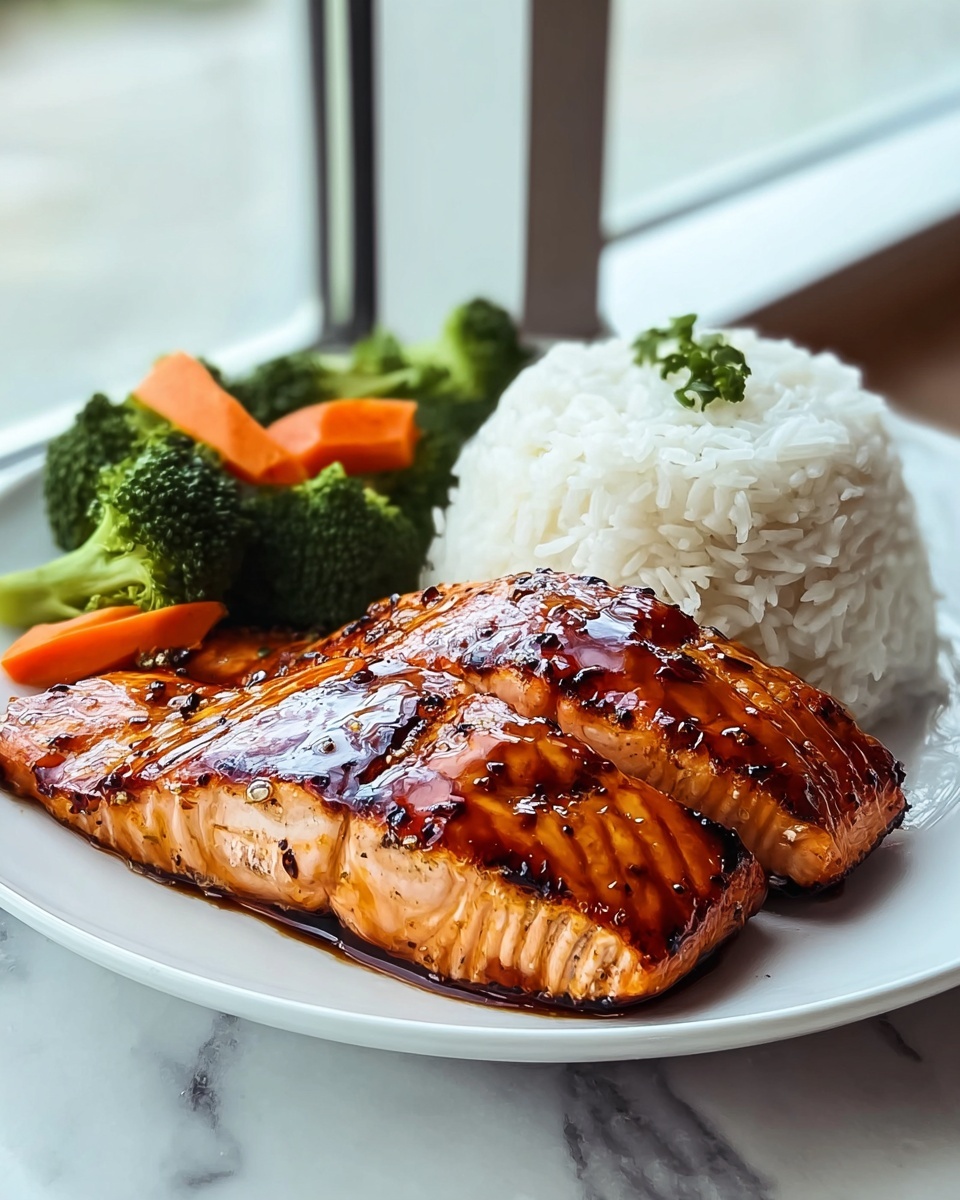
If you’ve been searching for a dish that perfectly balances rich flavor and wholesome goodness, then you’re going to love this Salmon Teriyaki with Steamed Rice: A Flavorful and Healthy Meal Recipe. It’s a lovely combination of tender, sticky-glazed salmon paired with fluffy, aromatic steamed rice that feels both comforting and fresh. Whether you’re cooking for family or impressing friends, this recipe delivers mouthwatering satisfaction with a health-conscious twist that will keep everyone coming back for seconds.

Ingredients You’ll Need
The magic of this Salmon Teriyaki with Steamed Rice: A Flavorful and Healthy Meal Recipe lies in its simplicity. Each ingredient plays a crucial role, bringing together vibrant colors, luscious textures, and balanced flavors that make the dish pop.
- Salmon fillets: Choose fresh, firm fillets for the best flavor and texture.
- Soy sauce: Provides that classic salty and savory teriyaki base.
- Mirin (sweet rice wine): Adds a gentle sweetness and depth to the glaze.
- Sake: Brings complexity and rounds out the sauce with subtle umami notes.
- Brown sugar or honey: Balances the saltiness with just the right amount of sweetness.
- Garlic and ginger: Freshly minced for aromatic warmth and zing.
- Sesame oil: Enhances the nutty flavor that complements the salmon beautifully.
- Steamed jasmine or sushi rice: The perfect soft and fragrant bed to soak up the teriyaki sauce.
- Green onions and toasted sesame seeds: Optional, for garnish and an extra layer of flavor and crunch.
How to Make Salmon Teriyaki with Steamed Rice: A Flavorful and Healthy Meal Recipe
Step 1: Prepare the Teriyaki Sauce
Start by combining soy sauce, mirin, sake, and brown sugar in a small saucepan over medium heat. Stir gently until the sugar dissolves and the mixture starts to thicken slightly into a glossy sauce. Add minced garlic and ginger at the end and simmer for another minute to release their wonderful fragrance. This sauce is the heart of your Salmon Teriyaki with Steamed Rice: A Flavorful and Healthy Meal Recipe.
Step 2: Cook the Salmon
Heat a skillet over medium heat and drizzle a little sesame oil to prevent sticking. Season your salmon fillets lightly with salt, then place them skin-side down. Cook for about 4-5 minutes until the skin crisps up beautifully, then flip and brush the tops liberally with your homemade teriyaki sauce. Cook the other side just long enough for the salmon to be tender but still moist inside.
Step 3: Steam the Rice
While the salmon cooks, rinse your jasmine or sushi rice under cold water until the water runs clear. This removes excess starch and gives you nicely separated grains. Cook the rice using a rice cooker or on the stovetop according to package instructions. The fluffy rice acts as a perfect base, soaking up all the wonderful teriyaki flavors when plated.
Step 4: Finish and Glaze
Once the salmon is cooked, remove it from the pan, and give the teriyaki sauce one last stir. You can pour a little more sauce over the fillets to glaze them perfectly before serving. This step ensures your Salmon Teriyaki with Steamed Rice: A Flavorful and Healthy Meal Recipe looks as good as it tastes.
How to Serve Salmon Teriyaki with Steamed Rice: A Flavorful and Healthy Meal Recipe

Garnishes
The simplest garnishes can truly elevate this dish. I love scattering thinly sliced green onions and toasted sesame seeds on top. Not only do they add a vibrant pop of color, but they also lend a satisfying crunch and subtle nutty aroma to each bite.
Side Dishes
Serve with lightly steamed or stir-fried vegetables like broccoli, snap peas, or bok choy for added freshness and crunch. A crisp cucumber salad dressed with rice vinegar can also brighten the meal, balancing the richness of the teriyaki glaze perfectly.
Creative Ways to Present
For a fun twist, try serving your salmon atop a bed of seasoned sushi rice wrapped in nori strips, or build a colorful bowl by adding avocado slices, pickled ginger, and edamame. These ideas help keep your Salmon Teriyaki with Steamed Rice: A Flavorful and Healthy Meal Recipe exciting and versatile for any occasion.
Make Ahead and Storage
Storing Leftovers
If you find yourself with leftovers, simply transfer the salmon and rice into airtight containers and store them in the refrigerator. They should stay fresh and delicious for up to two days — perfect for quick lunches or light dinners.
Freezing
You can freeze cooked salmon and rice separately for up to one month. Wrap the salmon tightly to prevent freezer burn, and store rice in a freezer-safe bag. Freezing allows you to enjoy this flavorful recipe even on your busiest days.
Reheating
Reheat leftovers gently to preserve moisture: steam the rice or microwave it covered with a damp paper towel, and warm the salmon in a low oven or microwave. Drizzling a little extra teriyaki sauce before serving will help revive the flavors beautifully.
FAQs
Can I use frozen salmon for this recipe?
Absolutely! Just make sure to thaw it completely and pat it dry before cooking to achieve that beautiful crispy skin and tender center.
What if I don’t have mirin or sake?
You can substitute with a combination of dry white wine and a teaspoon of sugar or honey. While it slightly changes the flavor profile, it still gets your sauce wonderfully close to authentic teriyaki taste.
Is this dish suitable for meal prepping?
Yes, it’s fantastic for meal prep since both salmon and steamed rice reheat very well. Just keep sauces separate until reheating to maintain freshness.
Can I make this recipe gluten-free?
Definitely! Use tamari or gluten-free soy sauce instead of regular soy sauce, and ensure your other condiments don’t contain gluten ingredients.
What kind of rice works best?
Jasmine or sushi rice is ideal for its sticky yet light texture, which complements the sticky teriyaki glaze perfectly, but any short or medium grain rice will work beautifully.
Final Thoughts
This Salmon Teriyaki with Steamed Rice: A Flavorful and Healthy Meal Recipe is a wonderful way to bring a taste of Japan into your kitchen without the fuss. It’s approachable, packed with flavor, and nourishing—exactly the kind of recipe you’ll want to keep on hand for both weeknight dinners and special occasions. Give it a try, and I promise it’ll become one of your go-to favorites, just like it is for me!
Print
Salmon Teriyaki with Steamed Rice: A Flavorful and Healthy Meal Recipe
- Prep Time: 15 minutes
- Cook Time: 10 minutes
- Total Time: 2 hours 25 minutes
- Yield: 16 bars
- Category: Dessert
- Method: No-Cook
- Cuisine: Fusion
- Diet: Gluten Free
Description
Delicious no-bake pistachio and coconut chocolate bars combining rich dark chocolate, crunchy pistachios, and a sweet coconut-honey topping, perfect for a healthy dessert or snack.
Ingredients
Chocolate Nut Layer
- 1 cup shelled pistachios
- 1 cup dark chocolate chips
Coconut Honey Topping
- 1/2 cup shredded coconut
- 1/4 cup honey
- 1/4 cup coconut oil
- 1/2 tsp vanilla extract
- Pinch of salt
Instructions
- Chop Pistachios: In a food processor, pulse the pistachios until finely chopped to create a crunchy base.
- Melt Chocolate: In a saucepan over low heat, gently melt the dark chocolate chips until smooth and creamy.
- Mix and Press Base: Combine the melted chocolate with the chopped pistachios thoroughly, then press the mixture evenly into a lined baking dish to form the bottom layer.
- Prepare Coconut Mixture: Using the same saucepan, melt the coconut oil and honey together over low heat. Stir in the shredded coconut, vanilla extract, and a pinch of salt until well combined.
- Layer and Spread: Pour the coconut mixture over the chocolate-pistachio base, spreading it evenly to cover the entire surface.
- Chill and Set: Place the baking dish in the refrigerator for at least 2 hours to allow the bars to set firmly.
- Cut and Serve: Once set, cut the mixture into bars and enjoy a delicious, healthy treat.
Notes
- Use a lined baking dish for easier removal of bars.
- Store bars in an airtight container in the refrigerator for up to one week.
- For a nut-free version, consider substituting pistachios with seeds like pumpkin or sunflower.
- Adjust sweetness by varying the amount of honey based on preference.
- Ensure chocolate chips are melted gently to prevent burning.


