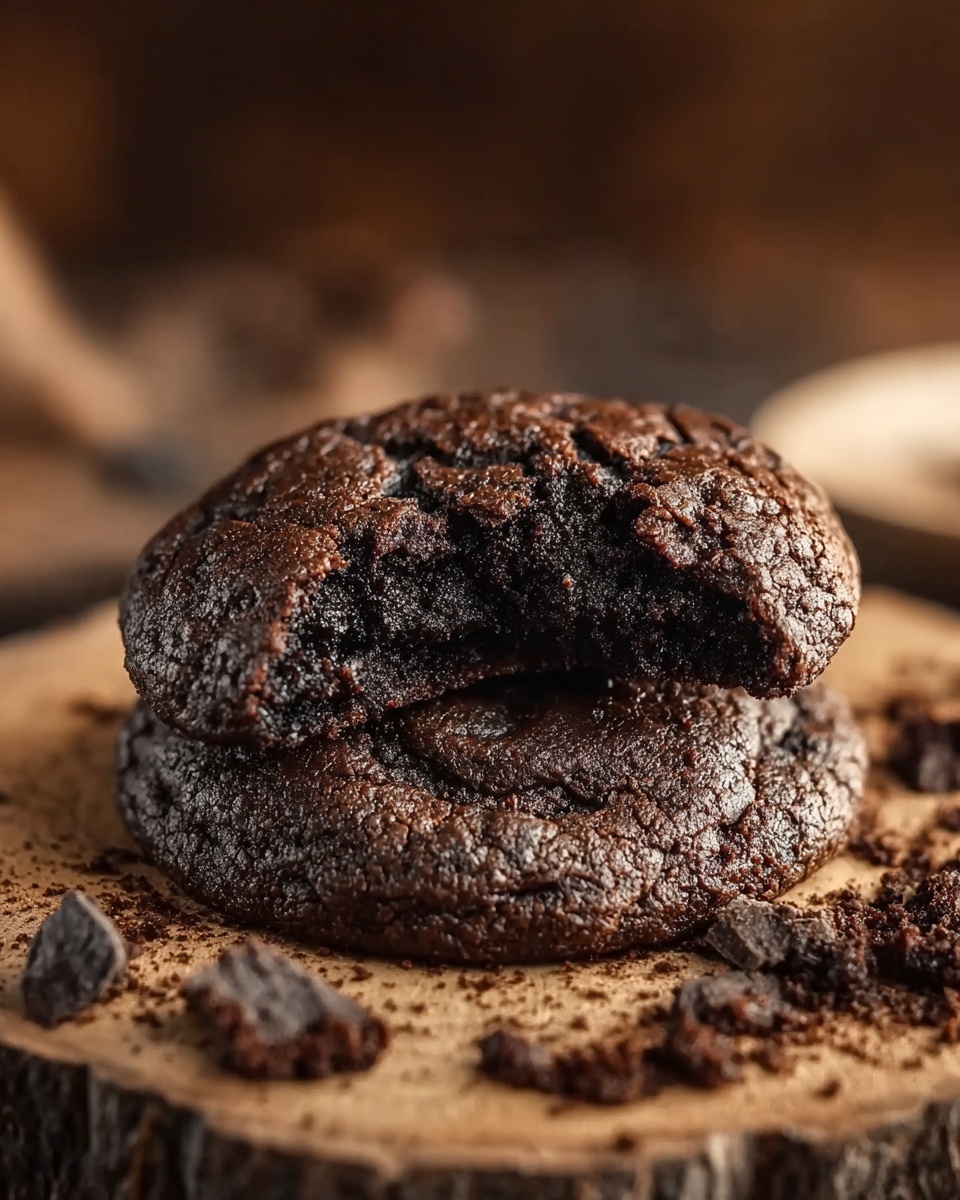
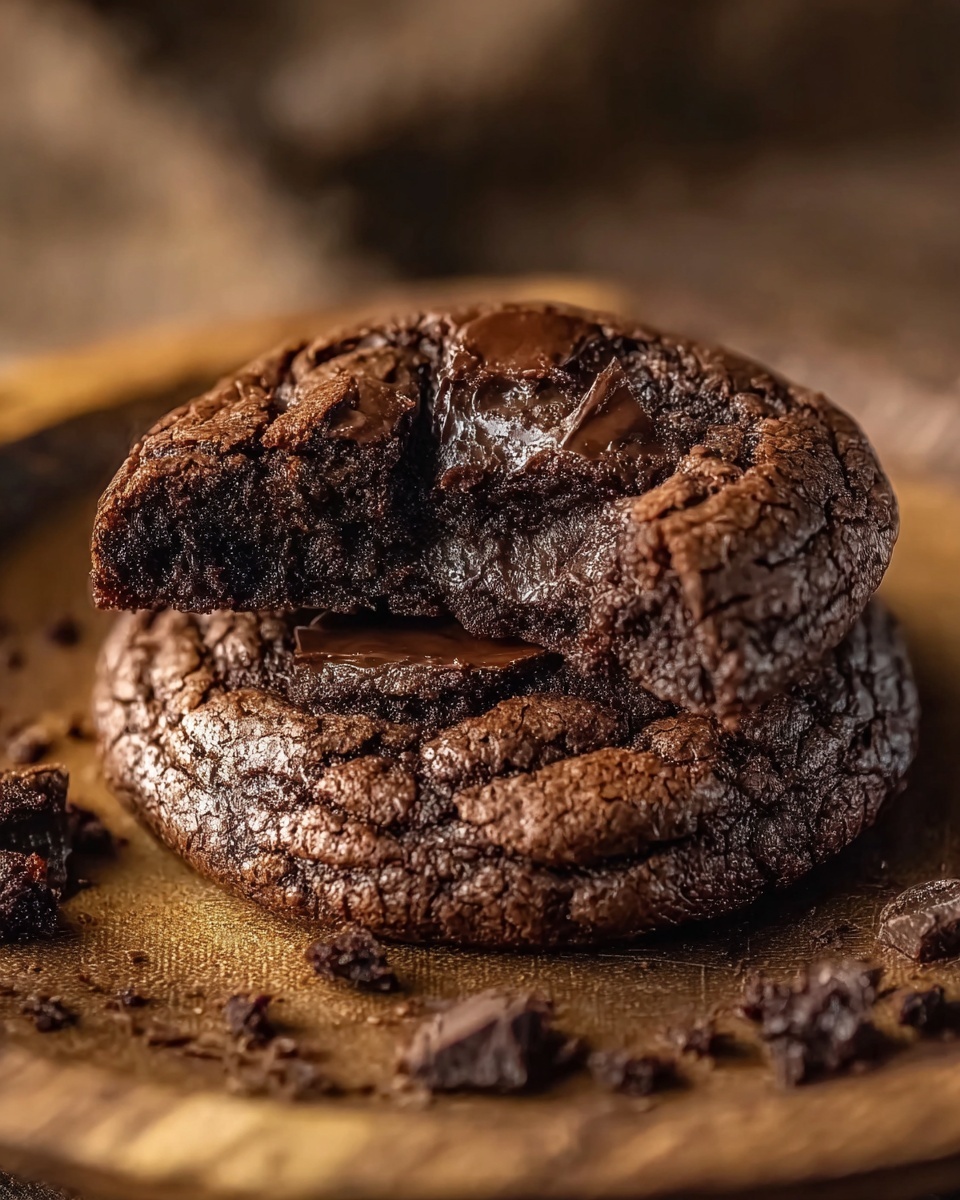
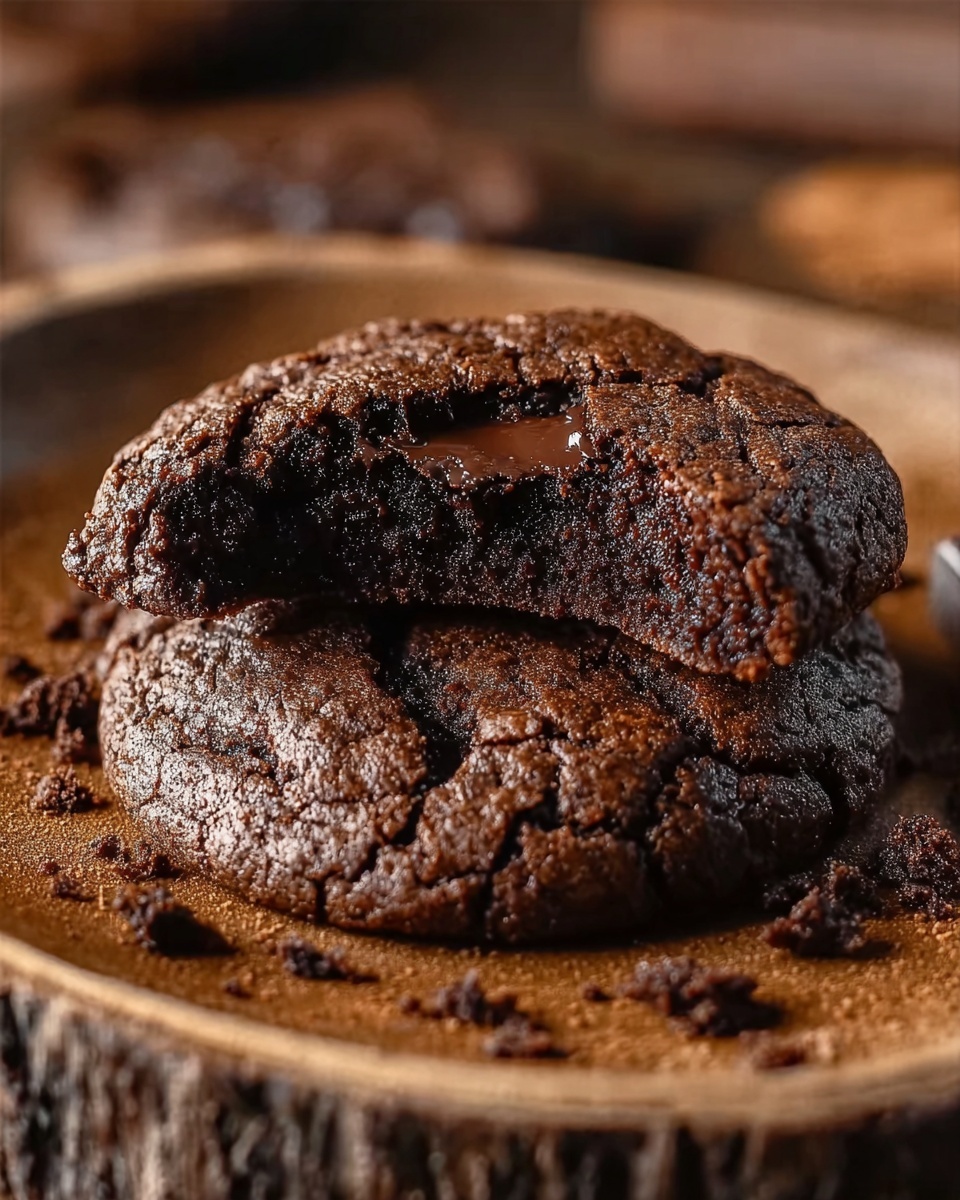
If you’re searching for that perfect indulgence that marries the rich, fudgy goodness of brownies with the fun, handheld convenience of cookies, your quest ends here. This Brownie Cookies Recipe is a delightful treat that brings all the gooey, chocolaty magic into each bite-sized cookie. Crisp edges giving way to a moist, chewy center make these cookies utterly irresistible and ideal for any occasion where chocolate lovers gather. Trust me, once you try this recipe, these brownie cookies will become your new favorite sweet snack.
Ingredients You’ll Need
The magic of this Brownie Cookies Recipe lies in its simple yet essential ingredients that work harmoniously to create rich flavor, perfect texture, and that classic chocolate-brown hue. Each item is thoughtfully chosen to give you that iconic brownie taste but with a cookie twist.
- Unsalted butter: Softened to help create a tender, melt-in-your-mouth texture that carries richness throughout.
- Granulated sugar: Adds a sweet crunch and balance to the deep cocoa notes.
- Brown sugar: Packed for moisture and a subtle caramel undertone enhancing the cookie’s depth.
- Large eggs: Bind the ingredients and provide structure, while also contributing to the fudgy consistency.
- Vanilla extract: A splash of pure vanilla lifts and rounds out the chocolate flavor beautifully.
- All-purpose flour: The base that gives the brownie cookies their shape and chewiness.
- Unsweetened cocoa powder: The star that delivers intense, bittersweet chocolate flavor and rich color.
- Baking soda: Helps the cookies rise just enough for a soft puff without losing that brownie density.
- Salt: Enhances and balances the sweetness for a well-rounded taste.
- Semi-sweet chocolate chunks: Melty pockets of chocolate throughout create luscious bursts in every bite.
- Chopped walnuts (optional): Add crunch and a nutty contrast to the smooth chocolate for those who like a little texture variety.
How to Make Brownie Cookies Recipe
Step 1: Prepare Your Workspace and Oven
Begin by preheating your oven to a steady 350 degrees Fahrenheit (175 degrees Celsius). Line your baking sheets with parchment paper to ensure your brownies don’t stick and come off cleanly, making cleanup a breeze.
Step 2: Cream the Butter and Sugars
In a large bowl, combine the softened butter with both granulated and brown sugars. Beat them together until the mixture is light, fluffy, and pale in color. This process is key to the texture, helping to incorporate air and create that soft crumb. Then, beat in the eggs one at a time to ensure they fully incorporate without curdling. Stir in the vanilla extract next, infusing your batter with warm, aromatic notes.
Step 3: Combine Dry Ingredients
In a separate bowl, whisk together the all-purpose flour, unsweetened cocoa powder, baking soda, and salt. Whisking ensures all the dry ingredients are evenly distributed, which means consistent flavor and texture throughout your cookies.
Step 4: Bring It All Together
Gradually add the dry mixture to your creamed butter and sugar bowl, mixing well but not over-beating to avoid tough cookies. Fold in the semi-sweet chocolate chunks along with the optional chopped walnuts if you want a delightful crunch and flavor contrast. This is where your batter transforms into a dough bursting with rich chocolate goodness.
Step 5: Scoop, Bake, and Cool
Drop the dough by rounded tablespoons onto your prepared baking sheets, spacing them out to let the cookies spread slightly. Bake for 10 to 12 minutes. Watch for the edges to become firm while the centers remain soft and fudgy—just like a brownie! Let the cookies cool on the sheets for five minutes before moving them to a wire rack to cool completely, which helps them set perfectly.
How to Serve Brownie Cookies Recipe
Garnishes
For an extra touch of decadence, sprinkle a pinch of flaky sea salt or dust with powdered sugar right before serving. A drizzle of melted white or dark chocolate can also create a stunning look and add an additional flavor layer that complements the brownie cookies beautifully.
Side Dishes
These brownie cookies are delightful on their own but pairing them with a glass of cold milk or a scoop of vanilla ice cream elevates the experience instantly. You could also serve them alongside fresh berries or a cup of rich espresso to balance the sweetness and bring out the chocolate’s complexity.
Creative Ways to Present
If you’re bringing these to a party or gifting them, stack the brownie cookies and tie them with a rustic ribbon for a charming homemade touch. For a festive look, sandwich two brownie cookies around a dollop of marshmallow fluff or cream cheese frosting to create brownie cookie sandwiches that will impress everyone.
Make Ahead and Storage
Storing Leftovers
Keep your leftover brownie cookies fresh by storing them in an airtight container at room temperature. They’ll maintain their chewy texture for up to five days—perfect for enjoying a few extras with your afternoon coffee or late-night snack cravings.
Freezing
You can freeze these cookies if you want to keep them longer. Place them in a single layer on a baking sheet to freeze individually, then transfer to a freezer-safe bag or container. They can stay frozen for up to three months and are great to pull out for spontaneous sweet treats.
Reheating
To bring back that freshly baked warmth, pop the brownie cookies in the microwave for about 10-15 seconds or warm them in a preheated oven at 300°F for a few minutes. This will revive the gooey chocolate centers and soften the edges beautifully.
FAQs
Can I substitute walnuts for another nut?
Absolutely! Pecans, almonds, or even hazelnuts would work wonderfully in this Brownie Cookies Recipe. Just chop them to a similar size so they integrate well with the dough and baked texture.
What if I don’t have cocoa powder?
You could use melted chocolate instead, but keep in mind you may need to adjust the flour slightly to maintain the right dough consistency. Cocoa powder brings a concentrated chocolate flavor that’s key to this recipe’s success.
Are these cookies gluten-free?
This recipe calls for all-purpose flour, so it’s not gluten-free as is. You can try substituting with a gluten-free flour blend, but results may vary. Make sure any blend you choose is suitable for baking and follow the package instructions.
Why are my brownie cookies spreading too much?
If the cookies spread too thin, it could be due to butter being too soft or the dough being too warm. Try chilling the dough in the fridge for about 30 minutes before baking to help the cookies hold their shape better.
Can I make these cookies dairy-free?
Yes! Swap out the unsalted butter for a dairy-free alternative like vegan margarine or coconut oil, and check your chocolate chunks to ensure they’re dairy-free. The texture and flavor will remain deliciously close to the original.
Final Thoughts
Now that you’ve got the recipe and all the tips to make these brownie cookies perfectly fudgy, chocolatey, and utterly scrumptious, there’s no reason to wait. Dive right in, bake up a batch, and watch how quickly these favorites disappear. Sharing this Brownie Cookies Recipe is like passing on a little piece of joy—so go ahead, treat yourself and everyone around you to these exceptional cookies today!
Print
Brownie Cookies Recipe
- Prep Time: 15 minutes
- Cook Time: 12 minutes
- Total Time: 27 minutes
- Yield: 24 cookies
- Category: Dessert
- Method: Baking
- Cuisine: American
Description
Deliciously fudgy brownie cookies that combine the rich, chocolatey flavor of brownies with the chewy, soft texture of cookies. Perfect for chocolate lovers looking for a treat that’s easy to make and share.
Ingredients
Wet Ingredients
- 1 cup unsalted butter, softened
- 1 cup granulated sugar
- 1 cup brown sugar, packed
- 2 large eggs
- 1 teaspoon vanilla extract
Dry Ingredients
- 2 cups all-purpose flour
- 3/4 cup unsweetened cocoa powder
- 1 teaspoon baking soda
- 1/2 teaspoon salt
Add-ins
- 2 cups semi-sweet chocolate chunks
- 1/2 cup chopped walnuts (optional)
Instructions
- Preheat Oven: Preheat your oven to 350°F (175°C) and line baking sheets with parchment paper to prevent sticking and ensure easy cleanup.
- Cream Butter and Sugars: In a large bowl, cream together the softened butter, granulated sugar, and brown sugar until the mixture becomes light and fluffy, which helps incorporate air for a tender texture.
- Add Eggs and Vanilla: Beat in the eggs one at a time, ensuring each is fully incorporated before adding the next, then stir in the vanilla extract for flavor.
- Combine Dry Ingredients: In a separate bowl, whisk together the all-purpose flour, unsweetened cocoa powder, baking soda, and salt to evenly distribute the leavening agents and cocoa.
- Mix Wet and Dry: Gradually add the dry ingredients to the creamed wet mixture, mixing well until combined but not overmixed to maintain tenderness.
- Fold in Chocolate and Nuts: Gently fold in the semi-sweet chocolate chunks and optional chopped walnuts to evenly distribute throughout the dough.
- Form and Bake Cookies: Drop rounded tablespoons of dough onto the prepared baking sheets, spacing them adequately. Bake in the preheated oven for 10-12 minutes or until the edges are firm but the centers remain soft.
- Cool: Allow the cookies to cool on the baking sheets for 5 minutes, then transfer them to a wire rack to cool completely before serving.
Notes
- For a nut-free version, simply omit the walnuts.
- Make sure not to overbake to keep the cookies soft and fudgy.
- Storing cookies in an airtight container helps maintain freshness for up to a week.
- Chilling the dough for 30 minutes before baking can help prevent spreading.


