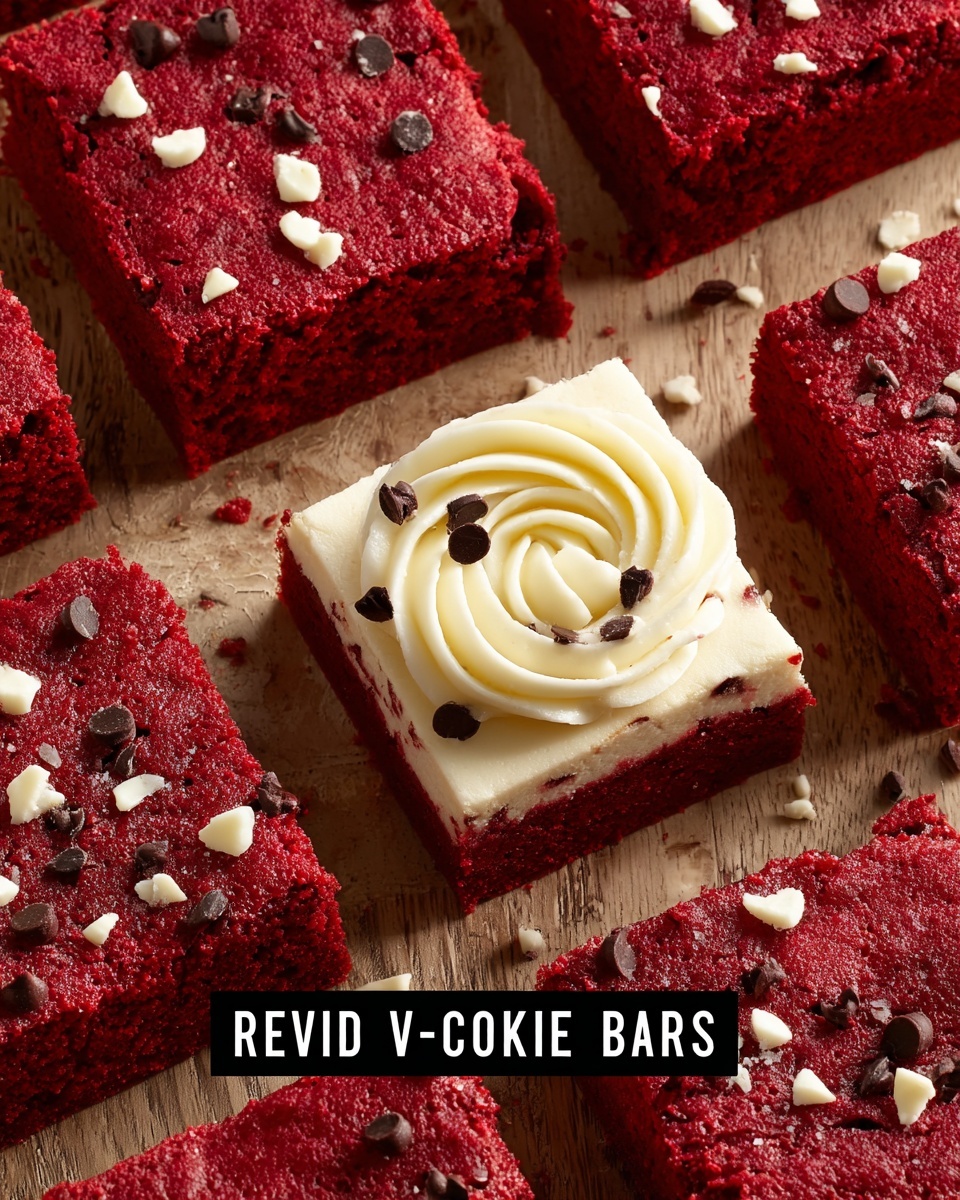
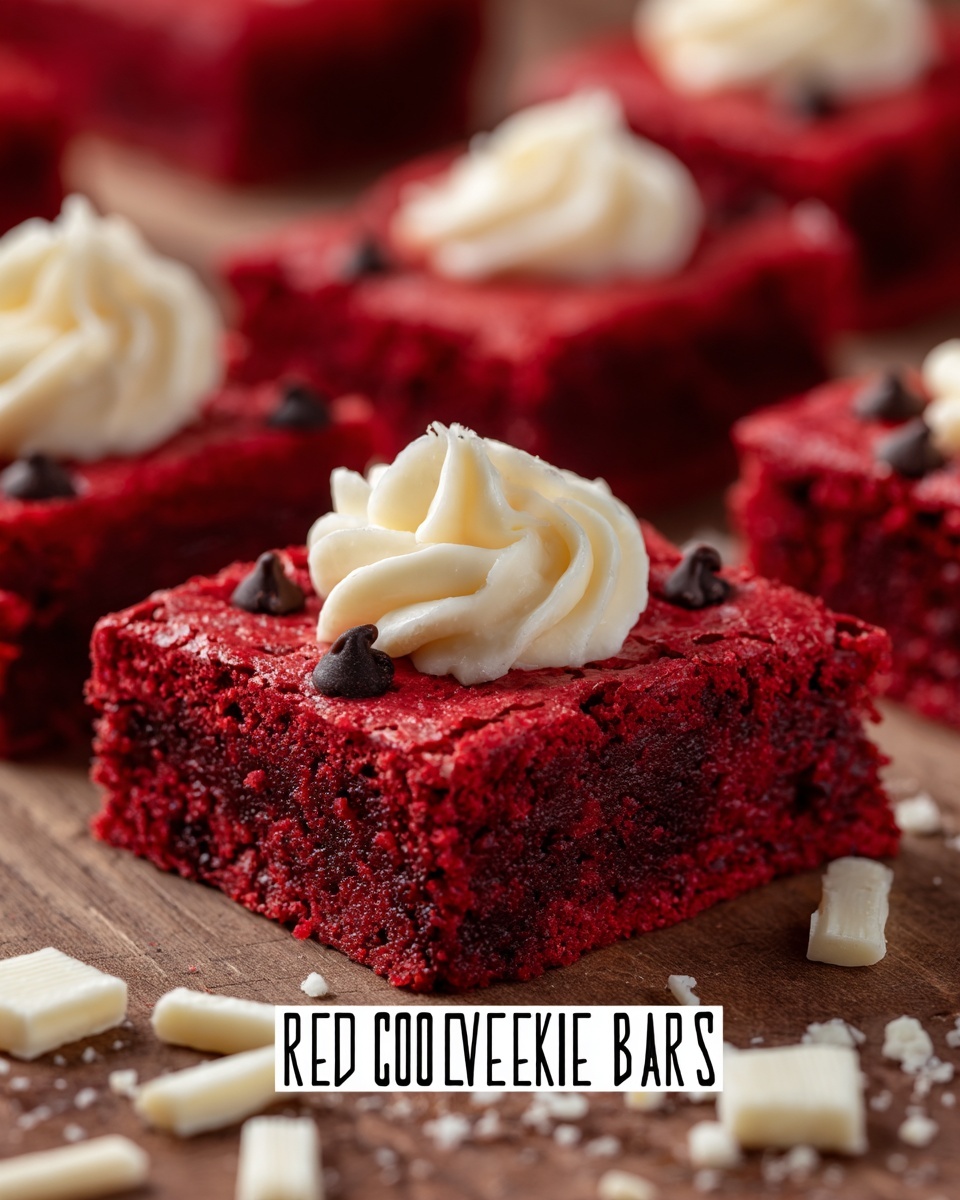
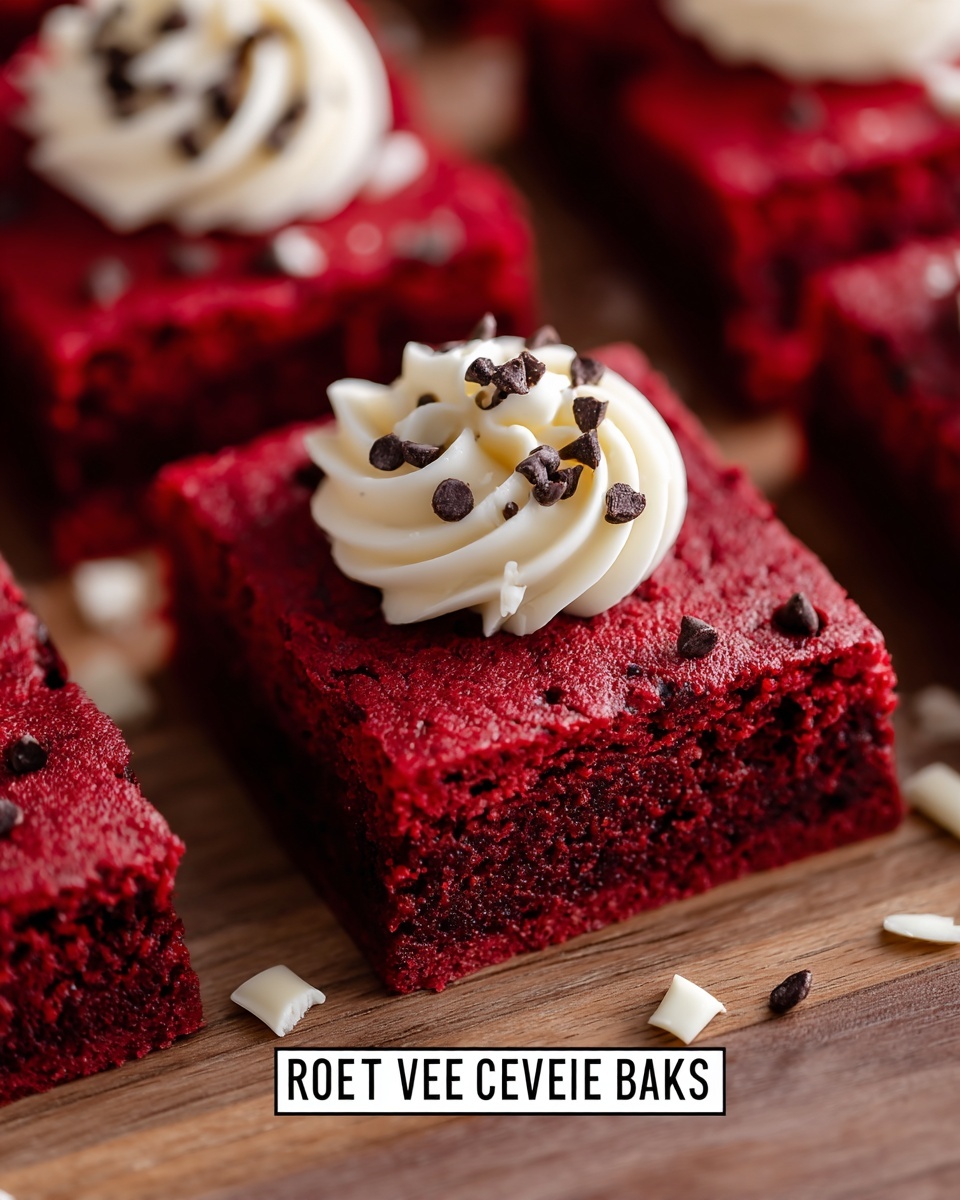
If you have a sweet tooth that loves a little twist of classic dessert, then you absolutely must try this Red Velvet Cookie Bars Recipe. These bars capture the luscious, velvety flavor that red velvet is famous for but with the chewy, comforting texture of a cookie. Bursting with vibrant color and just the right hint of cocoa, each bite delivers a rich experience that feels both familiar and exciting. Whether you nibble on them as a snack or serve them at a gathering, these cookie bars will quickly become your go-to treat!
Ingredients You’ll Need
The magic behind these Red Velvet Cookie Bars Recipe lies in its simple yet impactful ingredients. Each element plays a vital role—from the buttery richness to the pop of red coloring and the slight chocolate undertone that defines red velvet. Let’s dive into what you’ll need:
- Unsalted butter, 1 cup (2 sticks), melted: Provides moistness and a tender crumb that’s utterly delicious.
- Granulated sugar, 1 ½ cups: Sweetens the bars perfectly and helps achieve that chewy texture.
- Large eggs, 2: Bind all ingredients together and add richness.
- Vanilla extract, 2 tsp: Enhances the flavor and adds warmth.
- All-purpose flour, 2 ½ cups: Creates the structure for these bars, giving them their cookie-like firmness.
- Baking powder, 1 tsp: Helps the bars rise slightly for a soft yet sturdy texture.
- Cocoa powder, 1 tsp: Adds just the right hint of chocolate that is essential for true red velvet flavor.
- Salt, ½ tsp: Balances the sweetness and deepens the flavor profile.
- Red food coloring, 2 tbsp: The star ingredient that gives these bars their iconic bright red hue.
- White chocolate chips or chunks, ½ cup (optional): Sweet bursts that complement the cocoa undertone beautifully.
- Chopped nuts, ½ cup (optional): Adds a delightful crunch if you’re looking for some texture contrast.
How to Make Red Velvet Cookie Bars Recipe
Step 1: Preheat and Prepare Your Pan
Start by heating your oven to 350°F (175°C). Line a 9×13-inch baking pan with parchment paper or lightly grease it, ensuring your bars don’t stick and come out clean and easy to slice. This basic step sets the stage for a perfectly baked batch every time.
Step 2: Mix the Wet Ingredients
In a large bowl, whisk together your melted butter, granulated sugar, eggs, and vanilla extract until the mixture is smooth and glossy. This combination gives the bars their rich flavor base and luscious moist texture that feels like a warm hug.
Step 3: Whisk Together the Dry Ingredients
In a separate bowl, sift the flour, baking powder, cocoa powder, and salt. Sifting helps to evenly distribute the cocoa and baking powder so every bar has that classic red velvet taste with just the right lift.
Step 4: Combine Wet and Dry Mixtures
Gradually add your dry ingredients to the wet mixture, stirring gently until just combined. Overmixing can make the bars tough, so stop as soon as the ingredients are incorporated. Then, add the red food coloring and stir until the batter turns that signature vibrant red, signaling you’re on the right track!
Step 5: Fold in Optional Add-Ins
If you love a little surprise in your bars, gently fold in white chocolate chips, nuts, or both. The white chocolate adds a creamy sweetness while nuts contribute delightful crunch. But don’t worry if you prefer your bars plain—they’re perfect either way.
Step 6: Bake to Perfection
Spread the batter evenly into your prepared pan and place it into the oven. Bake for 20 to 25 minutes, or until a toothpick inserted into the center comes out clean. This step is where all the flavors marry and form that irresistible cookie bar texture.
Step 7: Cool and Slice
Once baked, allow your Red Velvet Cookie Bars Recipe to cool completely in the pan. Using the parchment paper, carefully lift the entire slab out and place it on a cutting board. Slice into 12 generous bars and get ready to savor every bite!
How to Serve Red Velvet Cookie Bars Recipe
Garnishes
These bars are stunning all on their own, but adding a dusting of powdered sugar, a drizzle of melted white chocolate, or a dollop of cream cheese frosting can really turn up the wow factor. Garnishes not only enhance appearance but add new layers of flavor that make each serving feel like a celebration.
Side Dishes
Pair your cookie bars with a cold glass of milk, a scoop of vanilla ice cream, or even a hot cup of coffee or tea. These combinations perfectly balance the sweetness and richness of the bars, creating an experience that’s cozy and indulgent.
Creative Ways to Present
Try serving your Red Velvet Cookie Bars Recipe on a beautiful platter arranged with fresh berries or mint leaves for a pop of color and freshness. You might also consider cutting them into bite-sized squares for a party platter or layering them with whipped cream in a dessert trifle for a stunning twist.
Make Ahead and Storage
Storing Leftovers
Once cool, store leftover bars in an airtight container at room temperature for up to 3 days. This keeps them soft, moist, and perfect for snacking any time you crave a sweet treat.
Freezing
These bars freeze wonderfully. Wrap individual bars or the entire slab tightly in plastic wrap and place in a freezer-safe container. They will keep for up to 2 months, offering you a handy dessert anytime you want a quick pick-me-up.
Reheating
Warm your frozen or refrigerated bars in the microwave for about 15-20 seconds or until soft, or reheat them gently in a low oven for a few minutes. This restores their chewy, tender texture and makes them taste freshly baked.
FAQs
Can I use natural cocoa powder instead of Dutch-processed cocoa?
Yes, you can substitute natural cocoa powder, but this recipe is designed for the milder flavor of Dutch-processed cocoa which complements the red velvet flavor perfectly. Natural cocoa can make the bars slightly more bitter, but it still works if that’s what you have on hand.
Is there a substitute for red food coloring?
You can try using natural alternatives like beet juice or powder for coloring, although it may produce a less vibrant red hue. The traditional bright red effect is best achieved with food coloring.
Can I make this recipe gluten-free?
Absolutely! Use a gluten-free all-purpose flour blend that can substitute 1:1 for regular flour. Just make sure it contains xanthan gum or a similar binder for the best texture.
What is the best way to cut the bars neatly?
Let the bars cool completely, then use a sharp knife and warm it under hot water before slicing. Wipe the knife clean between cuts for tidy edges and a beautiful presentation.
Can I omit the nuts and chocolate chips?
Definitely. The Red Velvet Cookie Bars Recipe tastes fantastic on its own. Consider adding your favorite mix-ins or skipping them entirely for a classic bar with tender crumb and rich flavor.
Final Thoughts
If you’re looking to add a spectacular, crowd-pleasing dessert to your repertoire, don’t hesitate to make this Red Velvet Cookie Bars Recipe. It’s an effortless, delightful way to enjoy the beloved flavors of red velvet with the comfort and convenience of a cookie bar. Trust me, once you make and share these, they’ll become a cherished favorite in your kitchen — I can’t wait for you to try them!
Print
Red Velvet Cookie Bars Recipe
- Prep Time: 10 minutes
- Cook Time: 20 minutes
- Total Time: 30 minutes
- Yield: 12 bars
- Category: Dessert
- Method: Baking
- Cuisine: American
Description
Delight in these moist and decadent Red Velvet Cookie Bars, perfect for any occasion. With a rich buttery base, a hint of cocoa, and the classic red velvet color, these bars are easy to make and can be customized with white chocolate chips and nuts for added texture and flavor.
Ingredients
Wet Ingredients
- 1 cup (2 sticks) unsalted butter, melted
- 1 ½ cups granulated sugar
- 2 large eggs
- 2 tsp vanilla extract
Dry Ingredients
- 2 ½ cups all-purpose flour
- 1 tsp baking powder
- 1 tsp cocoa powder
- ½ tsp salt
Add-ins (Optional)
- 2 tbsp red food coloring
- ½ cup white chocolate chips or chunks
- ½ cup chopped nuts
Instructions
- Preheat oven: Preheat your oven to 350°F (175°C). Line a 9×13-inch baking pan with parchment paper or grease it lightly to prevent sticking.
- Mix wet ingredients: In a large bowl, whisk together the melted butter, granulated sugar, eggs, and vanilla extract until the mixture is smooth and well combined.
- Combine dry ingredients: In a separate bowl, sift together the all-purpose flour, baking powder, cocoa powder, and salt to ensure an even distribution of the dry ingredients.
- Combine wet and dry: Gradually add the dry ingredients to the wet mixture, stirring gently until just combined. Add the red food coloring and mix until the batter achieves an even red hue.
- Add mix-ins (optional): Fold in the white chocolate chips and/or chopped nuts if you desire extra texture and flavor in your cookie bars.
- Bake: Spread the batter evenly in the prepared pan. Bake for 20 to 25 minutes, or until a toothpick inserted into the center of the bars comes out clean.
- Cool and cut: Allow the cookie bars to cool completely in the pan. Carefully lift them out using the parchment paper and cut into 12 even bars.
Notes
- Ensure not to overmix the batter after adding the dry ingredients to keep the bars tender.
- Adjust the amount of red food coloring for a deeper or lighter red color based on preference.
- Optional mix-ins like white chocolate chips and nuts can be omitted or substituted with your favorite add-ins.
- Store the cookie bars in an airtight container at room temperature for up to 4 days or refrigerate for longer freshness.
- For a richer flavor, use Dutch-processed cocoa powder instead of natural cocoa powder.


