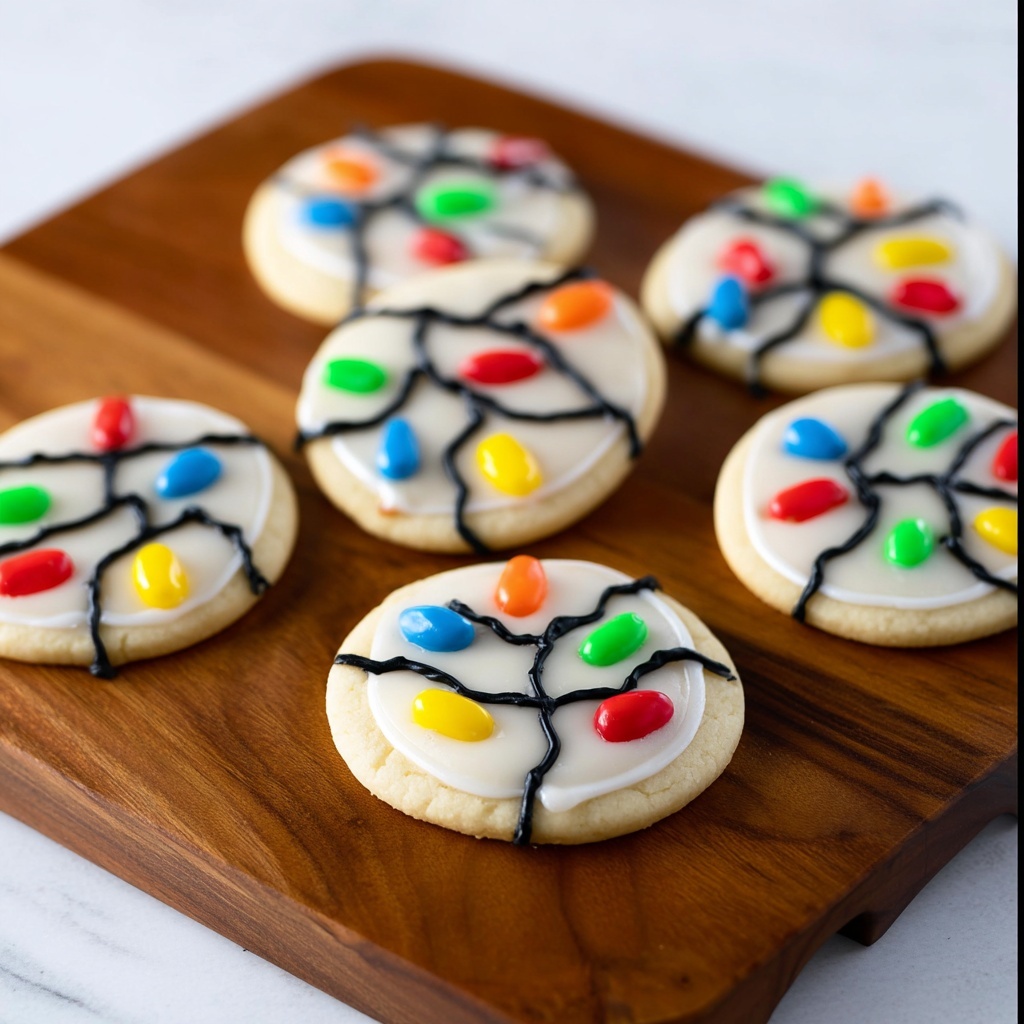
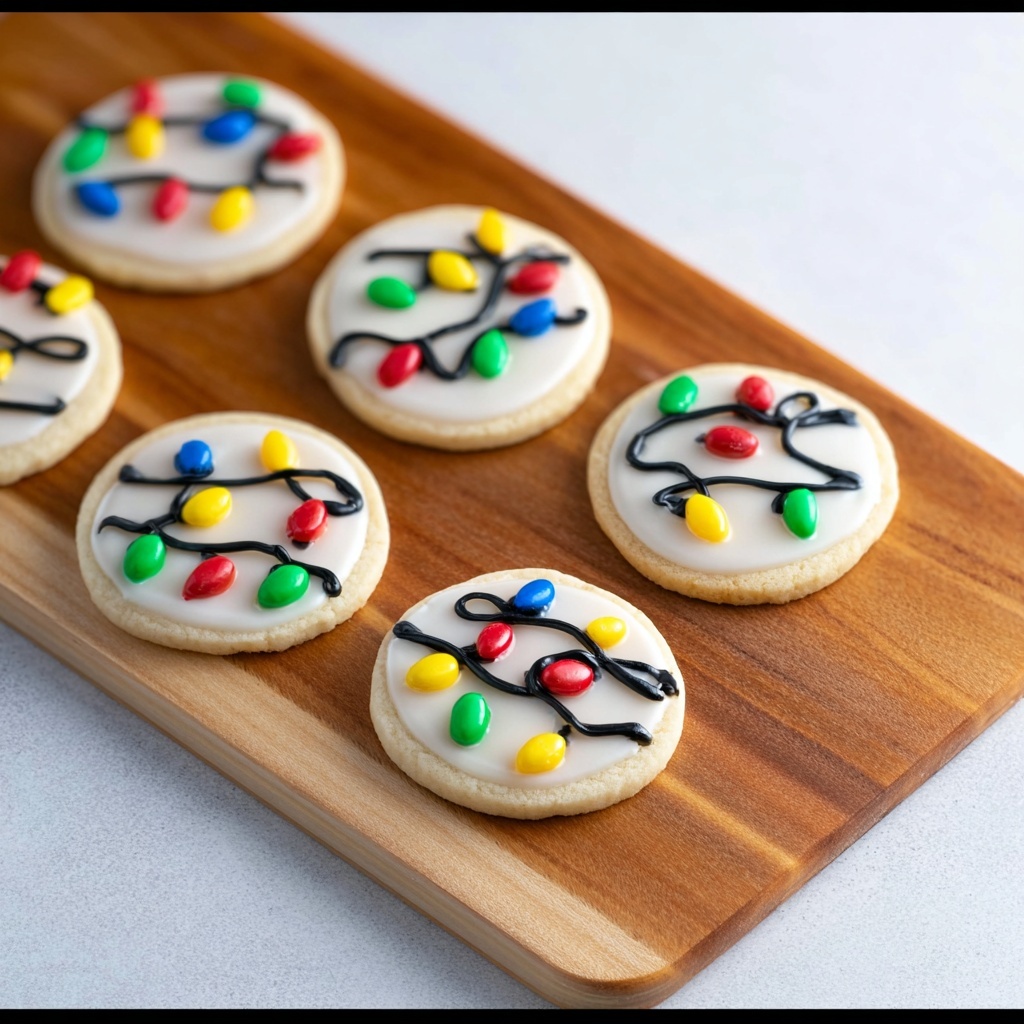
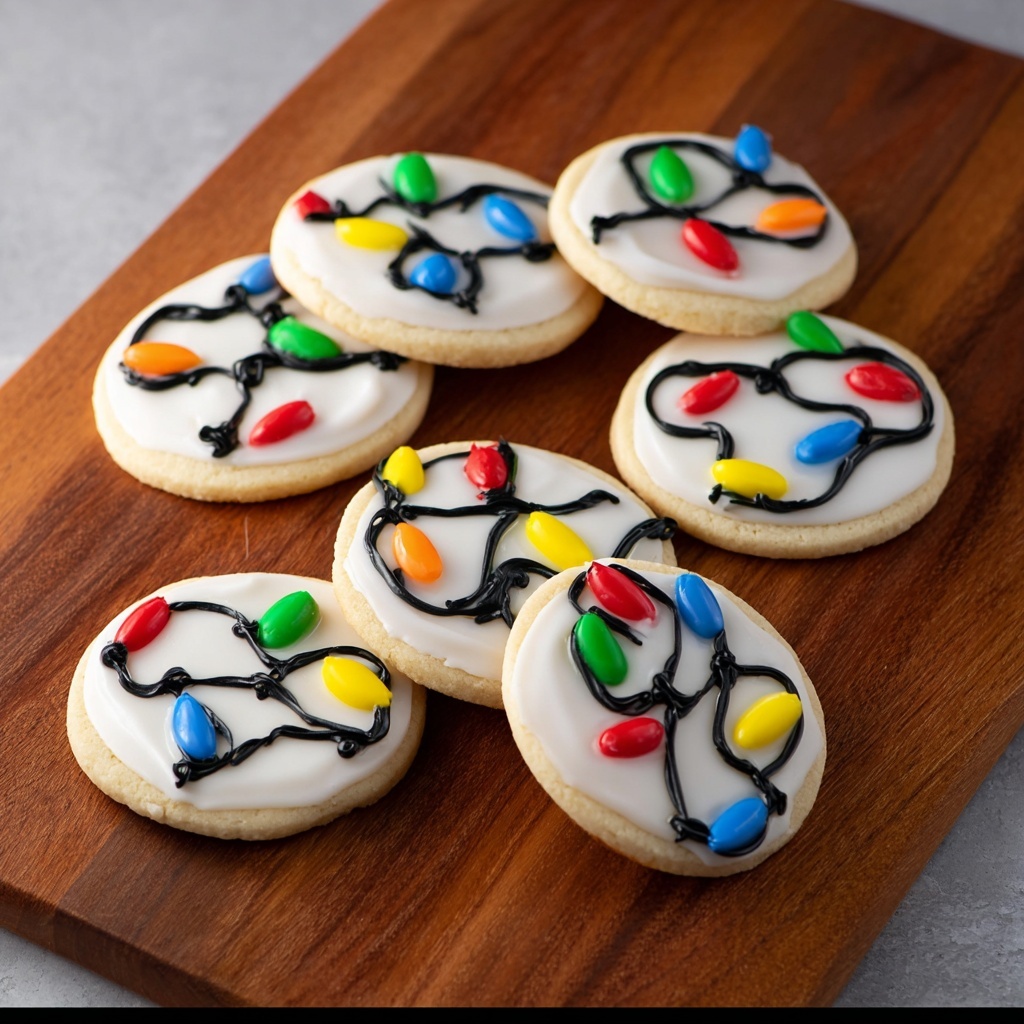
There is something truly magical about the festive spirit captured in sweet treats, and this Christmas Light Cookies Recipe brings that joy right to your kitchen. These charming cookies are not only adorable with their colorful M&M “lights” beautifully outlined in royal icing, but they also offer a perfectly soft, sugary base that melts in your mouth. Whether you’re baking with family or preparing to wow your holiday guests, this recipe is a delightful way to light up your holiday celebrations with creativity and deliciousness.
Ingredients You’ll Need
Gathering a handful of simple but essential ingredients will set you up for success with this recipe. Each component plays an important role in creating the perfect balance of texture, color, and flavor that makes these cookies stand out on any holiday cookie tray.
- Your favorite sugar cookie dough: Whether homemade or store-bought, this is your soft and sweet cookie base that keeps the decorating fun and flavorful.
- 4 cups powdered sugar: The key to smooth, glossy royal icing that hardens just right.
- 3 tablespoons meringue powder: Adds stability to the royal icing to help it dry perfectly for decorating.
- 8-10 tablespoons warm water: Used to achieve the ideal consistency for flooding and piping your icing.
- Black writing icing: This is your “wire” for the light strand, adding detail and contrast that brings the design to life.
- M&M candies: Bright, colorful “bulbs” that sit on top of the icing and make your cookies pop with festive cheer.
How to Make Christmas Light Cookies Recipe
Step 1: Prepare Your Cookie Base
Start with your favorite sugar cookie dough, either homemade or store-bought. Roll it out and cut into your desired shapes, then bake according to directions. Cooling is essential here—make sure your cookies are completely cool before moving on to icing so your toppings don’t melt or slide off.
Step 2: Whip Up Your Royal Icing
In a large bowl, combine powdered sugar and meringue powder. Add warm water gradually, beginning with 8 tablespoons. Use a hand mixer to beat the mixture for 1-2 minutes until it’s smooth and silky. If the icing feels too thick, add water one tablespoon at a time until it reaches a soft, spreadable consistency—ideal for that flawless, glassy finish.
Step 3: Prepare Your Piping Bag
Spoon the royal icing into a piping bag fitted with a tiny tip. Snip off just a bit of the end to give you precise control for outlining and flooding the cookies without any mess.
Step 4: Outline and Flood Your Cookies
Start by drawing a neat circle around the edge of each cookie with your icing. This barrier will prevent flooding icing from running off. Next, gently fill in the circle with more icing. If you spot any bare spots, a toothpick is your best friend to carefully nudge the flood icing into place. Take your time here—smooth, bubbly-free icing makes all the difference.
Step 5: Let the Icing Set
Allow your base icing to dry completely. This step is crucial because it ensures the cookie surface is firm enough to support the decorations that will make these Christmas Light Cookies pop with flair.
Step 6: Create the Light Strand
Use the black writing icing to draw your light string pattern—play around with curves and loops to resemble a real holiday light strand. This contrast adds charm and helps your colorful bulbs stand out brilliantly.
Step 7: Add the Candy Lights
Cut M&M candies in half to reveal the colorful inside, then gently press the flat, cut side onto the icing at intervals along your drawn strand. These little “bulbs” make the cookies so festive and fun to look at—and to eat, of course!
How to Serve Christmas Light Cookies Recipe
Garnishes
Keep it simple and sweet. A light dusting of edible glitter or sanding sugar can add sparkle without overwhelming your beautiful candy “lights.” Fresh holly leaves or sprigs placed artfully around your cookie platter can also enhance the festive vibe.
Side Dishes
These cookies pair wonderfully with cozy drinks like hot cocoa, spiced apple cider, or a creamy eggnog. They also make a cheerful side to a holiday dessert spread featuring fruitcake, peppermint bark, or gingerbread.
Creative Ways to Present
Bundle a few cookies in clear cellophane bags tied with twinkling ribbon for adorable gifts. You could also use cookie cutters to customize shapes and create themed assortments that double as charming holiday decorations for your table.
Make Ahead and Storage
Storing Leftovers
Store your Christmas Light Cookies Recipe creations in an airtight container at room temperature. Layer them between sheets of parchment paper to avoid smudging the icing, and enjoy their freshness for up to a week.
Freezing
If you want to bake ahead, freeze undecorated sugar cookies in a single layer on a baking sheet, then transfer to a freezer bag. Decorated cookies can also be frozen, but make sure the icing is completely dry and store them in a rigid container to protect the decorations.
Reheating
Since these cookies are best enjoyed at room temperature, simply take them out of the fridge or freezer and let them thaw before serving. Avoid microwaving, as it can soften the icing and affect texture.
FAQs
Can I use store-bought sugar cookie dough for this recipe?
Absolutely! Using store-bought dough is a convenient shortcut that still yields delicious, soft cookies perfect for decorating with royal icing and candies.
What if I don’t have meringue powder?
You can substitute with egg whites or pasteurized egg whites for royal icing, but meringue powder is recommended for consistency and ease, especially around the holidays.
How long does the royal icing take to dry?
It usually needs at least 1-2 hours at room temperature to set hard enough for decorating, but for best results, let it dry overnight.
Can I use different candies instead of M&Ms?
Yes! Small candies like mini chocolate chips or colored sprinkles can work, but M&Ms give the best color and shape for that classic Christmas light look.
How do I keep the icing from running off the cookie?
Outlining the cookie with a thicker icing barrier before flooding and using the correct icing consistency ensures the flooding icing stays neatly inside the lines.
Final Thoughts
There’s nothing quite like the joy of decorating and sharing Christmas Light Cookies Recipe during the holidays. This festive project brings out the kid in everyone and fills your home with the sweet aroma of freshly baked cookies and holiday cheer. Give these bright and beautiful treats a try—you’ll be lighting up faces and taste buds all season long!
Print
Christmas Light Cookies Recipe
- Prep Time: 25 minutes
- Cook Time: N/A
- Total Time: 25 minutes plus cooling and icing setting time
- Yield: 16 cookies
- Category: Dessert
- Method: No-Cook
- Cuisine: American
Description
Celebrate the holiday season with these festive Christmas Light Cookies, featuring soft sugar cookies topped with smooth royal icing and decorated with colorful M&M candies to mimic glowing Christmas lights. Perfect for holiday parties and family gatherings, these cookies are fun to decorate and delightful to eat.
Ingredients
Cookie Dough
- Your favorite sugar cookie dough (store bought or homemade)
Royal Icing
- 4 cups powdered sugar
- 3 tablespoons meringue powder
- 8–10 tablespoons warm water
Decoration
- Black writing icing
- 1/2 cup M&M candies, cut in half
Instructions
- Prepare Cookie Dough: Prepare the sugar cookie dough according to the package or your homemade recipe’s directions. Bake as needed, then allow the cookies to cool completely before decorating.
- Make Royal Icing: In a large mixing bowl, combine the powdered sugar, meringue powder, and 8 tablespoons of warm water. Beat with a hand mixer for 1 to 2 minutes until the icing is smooth. If the icing is too thick, slowly add more warm water 1 tablespoon at a time until it reaches a consistency that is smooth but not runny, allowing the icing to meld back together for a smooth surface on the cookies.
- Prepare Piping Bag: Transfer the royal icing to a piping bag and snip off just the very tip to allow precise control when decorating.
- Outline and Flood Cookies: Pipe a circle of royal icing around the edge of each cookie, then flood the inside of the circle with icing. Use a toothpick to gently spread the icing if there are any blank spots, being careful not to over-flood. Let the icing settle and create a smooth even surface.
- Let Icing Set: Allow the royal icing on the cookies to set completely, which may take about 20-30 minutes, so it becomes firm and ready for decoration.
- Create Light Strand: Using black writing icing, draw a pattern resembling a strand of Christmas lights across each cookie. You can be creative with your design to mimic stringed holiday lights.
- Add M&M Bulbs: Cut about 1/2 cup of M&M candies in half, then place the flat, cut side down onto the black icing strand to represent colorful Christmas light bulbs. Let everything set completely before serving or packaging.
Notes
- Make sure cookies are fully cooled before icing to prevent melting or sliding.
- Royal icing consistency is key: too thick and it’s hard to spread, too thin and it runs off the cookie.
- Allow plenty of time for royal icing to set completely for best decorating results.
- You can use other small colorful candies if you prefer instead of M&Ms.
- Store the decorated cookies at room temperature in an airtight container for up to one week.
