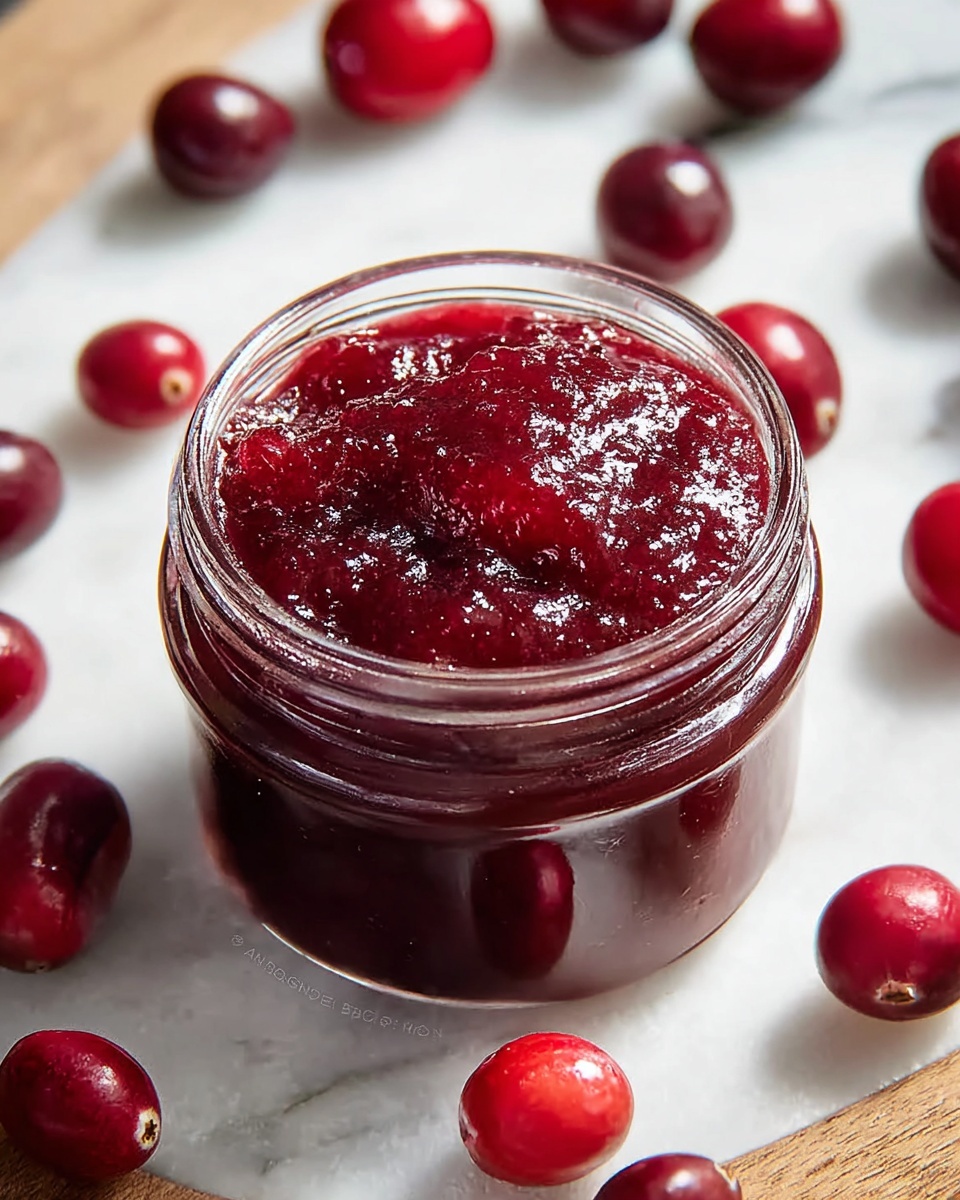
If you’ve ever dreamed of capturing the bright, tangy sweetness of fresh cherries all year round, this Homemade Cherry Jam Recipe is your perfect answer. Bursting with vibrant cherry flavor and a luscious, spreadable texture, this jam turns simple pantry staples into a jar of pure joy. Whether slathered on toast for breakfast or stirred into yogurt for a midday delight, it’s a recipe that celebrates both the beauty and bounty of fresh cherries in a way that feels utterly special yet wonderfully approachable.
Ingredients You’ll Need
These ingredients are wonderfully straightforward, but each one plays a crucial role in bringing out the perfect balance of flavor, sweetness, and consistency in your jam.
- 4 cups fresh cherries (pitted): The star of the show, their natural sweetness and juiciness create the jam’s rich base.
- 1 ½ cups granulated sugar: Not just for sweetness, sugar helps preserve the jam and contributes to its smooth texture.
- 2 tablespoons lemon juice (freshly squeezed): Brightens the flavor and adds acidity to perfectly balance the sweetness.
- 1 package (1.75 oz) fruit pectin: Essential for that perfect set; it thickens the jam and gives it that desirable spreadable quality.
How to Make Homemade Cherry Jam Recipe
Step 1: Prepare Your Cherries
Start by washing your cherries thoroughly and removing the pits. A cherry pitter makes this task quick and painless, but if you don’t have one, cutting them in half works just fine. This preparation sets the stage by ensuring you have pure, fresh fruit to work with.
Step 2: Combine Ingredients and Macerate
In a large pot, toss together the pitted cherries, sugar, and lemon juice. Stir everything gently until the sugar begins to dissolve, then let the mixture sit for about 30 minutes. This resting period helps the cherries release their natural juices, intensifying the flavor and creating a juicy base for your jam.
Step 3: Heat the Mixture
Place the pot over medium heat and warm the mixture, stirring frequently. As it comes to a gentle boil, the sugar will fully dissolve and the cherries will soften, melding the flavors beautifully.
Step 4: Add the Pectin
Once your cherry mixture is boiling, stir in the fruit pectin according to the package instructions. Continue cooking and stirring until the jam returns to a rolling boil. This step is vital for activating the pectin, which will give your jam that lovely thick consistency.
Step 5: Test for Doneness
To know when your jam is perfectly set, use the classic cold plate test: place a small spoonful of jam onto a chilled plate and push it gently with your finger. If the surface wrinkles, you’re good to go! This simple trick ensures your Homemade Cherry Jam Recipe isn’t too runny or overly stiff.
Step 6: Jar and Preserve
Carefully ladle the hot jam into sterilized jars, filling them almost to the top. Seal the jars tightly and process them in boiling water for 5 to 10 minutes. This step not only preserves your jam safely but also locks in that fresh burst of cherry flavor for months to come.
How to Serve Homemade Cherry Jam Recipe
Garnishes
Adding a touch of fresh ingredients like a rosemary sprig or a cinnamon stick alongside your jam can elevate your presentation and offer a complementary aroma. A sprinkle of chopped toasted almonds or a dollop of cream cheese nearby can also add texture and flavor contrasts that make each bite memorable.
Side Dishes
This jam pairs fabulously with warm toast, buttery croissants, or flaky biscuits for breakfast. It also shines beside cheese boards, especially when served alongside creamy brie or tangy goat cheese, turning your snack into a sophisticated treat.
Creative Ways to Present
Try swirling homemade cherry jam into yogurt parfaits, spooning it over vanilla ice cream, or using it as a sweet glaze for roasted meats like pork or chicken. These creative twists showcase the versatility of this fantastic jam, making every meal a little more special.
Make Ahead and Storage
Storing Leftovers
If you find yourself with extra jars, keep your sealed jam in a cool, dark place for up to a year. Once opened, refrigerate and use within a month to enjoy its fresh flavor and thick, spreadable texture.
Freezing
While canning is ideal for long-term storage, you can freeze your jam in airtight containers for up to six months. Just be sure to leave some space in the container as the jam will expand when frozen.
Reheating
When ready to use frozen jam, thaw it in the refrigerator overnight. If needed, gently warm it on the stove over low heat, stirring occasionally to regain that luscious consistency without burning.
FAQs
Can I use frozen cherries instead of fresh?
Absolutely! Frozen cherries work well for this recipe. Just thaw and drain them slightly before cooking to avoid excess water diluting your jam.
What if I don’t have fruit pectin?
You can still make cherry jam without pectin, but it may take longer to set and could have a softer texture. Cooking the mixture down for a longer period will help achieve a thicker consistency.
How do I know when the jam is done?
The best way is the cold plate test: a wrinkle on the surface after pushing the jam gently means it’s ready. This ensures your jam sets perfectly without being too runny.
Can I adjust the sweetness?
Yes, feel free to adjust sugar to your taste, keeping in mind that sugar acts as a preservative and affects texture. Reducing sugar too much may result in a softer set.
Is Homemade Cherry Jam Recipe suitable for gifting?
Definitely! Jarred homemade cherry jam makes a thoughtful, delicious gift that friends and family will appreciate, especially when you add a pretty label or ribbon.
Final Thoughts
This Homemade Cherry Jam Recipe is truly a delightful way to capture summer’s sweetest moment in a jar. Simple to make, bursting with fresh cherry flavor, and endlessly versatile, it’s sure to become one of your cherished kitchen staples. I can’t wait for you to try it and discover your own favorite ways to enjoy this charming jam!
Print
Homemade Cherry Jam Recipe
- Prep Time: 30 minutes
- Cook Time: 15 minutes
- Total Time: 45 minutes
- Yield: Approximately 2 cups (about 32 servings)
- Category: Jam & Preserves
- Method: Stovetop
- Cuisine: American
Description
This homemade cherry jam recipe yields approximately 2 cups of sweet, tangy cherry preserves, perfect for spreading on toast or adding to desserts. Made with fresh cherries, sugar, lemon juice, and fruit pectin, the jam is cooked on the stovetop and preserved through a boiling water bath to ensure safe, long-lasting storage.
Ingredients
Cherries
- 4 cups fresh cherries, pitted
Other Ingredients
- 1 ½ cups granulated sugar
- 2 tablespoons freshly squeezed lemon juice
- 1 package (1.75 oz) fruit pectin
Instructions
- Prepare Cherries: Wash the cherries thoroughly and remove the pits. You can use a cherry pitter for faster removal or cut the cherries in half to extract the pits manually.
- Mix Ingredients: In a large pot, combine the pitted cherries, granulated sugar, and freshly squeezed lemon juice. Stir the mixture well, then let it sit for 30 minutes to allow the cherries to release their natural juices.
- Heat the Mixture: Place the pot over medium heat and bring the cherry mixture to a boil, stirring frequently to prevent sticking and burning.
- Add Pectin: Once the mixture starts boiling, stir in the fruit pectin according to the package instructions. Continue cooking and stirring until the jam reaches a full rolling boil again.
- Test for Doneness: Use the cold plate test by placing a small amount of jam on a chilled plate and pushing it with your finger. If the jam wrinkles and holds its shape, it has reached the desired consistency.
- Jar and Preserve: Carefully ladle the hot jam into sterilized jars, seal each jar tightly with a lid, and process them in a boiling water bath for 5 to 10 minutes to ensure preservation and safety for storage.
Notes
- Use fully ripe, fresh cherries for the best flavor and natural sweetness.
- Ensure jars are properly sterilized to prevent contamination and spoilage.
- The boiling water bath processing time may vary based on altitude; adjust accordingly.
- Store sealed jars in a cool, dark place; refrigerate after opening.
- You can adjust the sugar amount slightly depending on your sweetness preference, but it may affect the jam’s setting.


