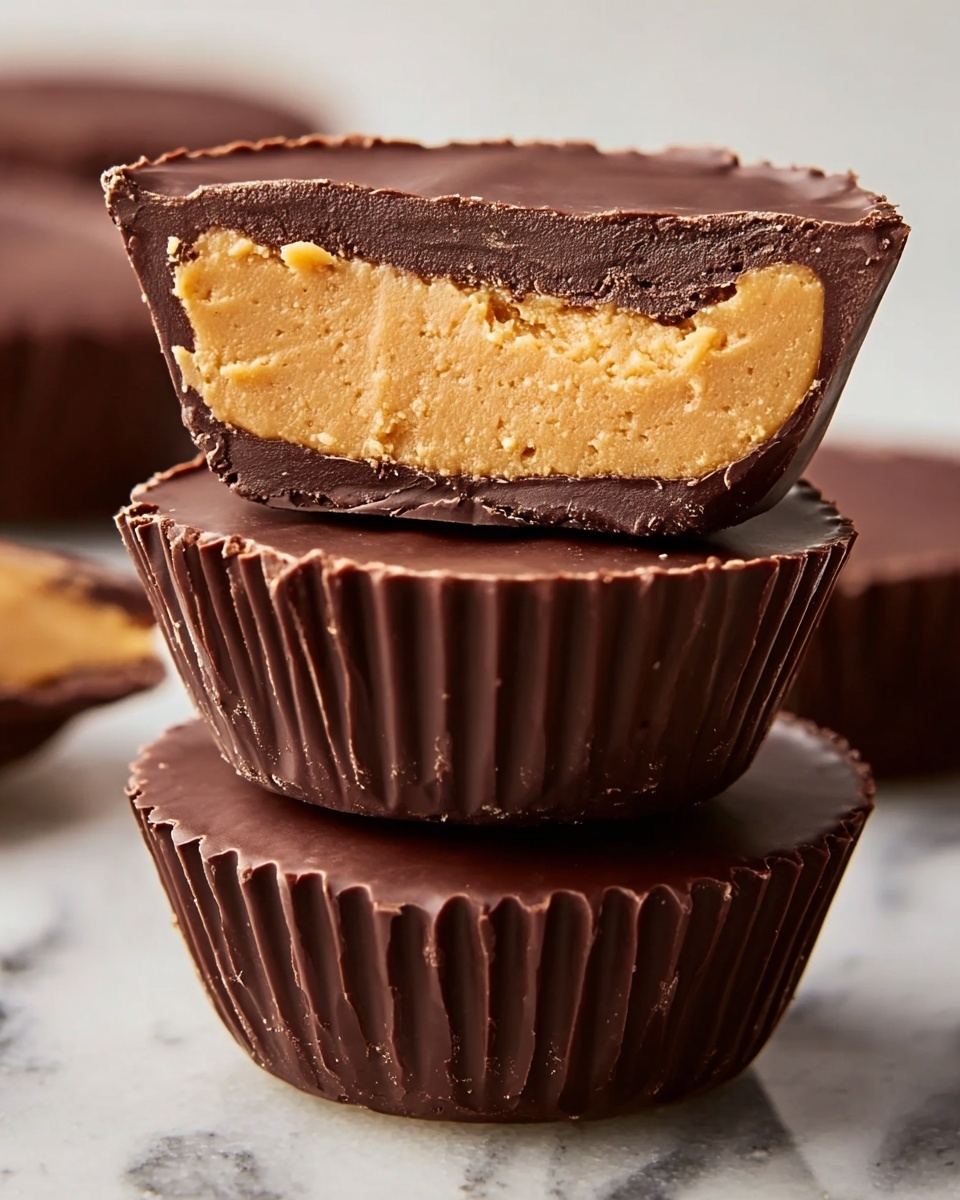
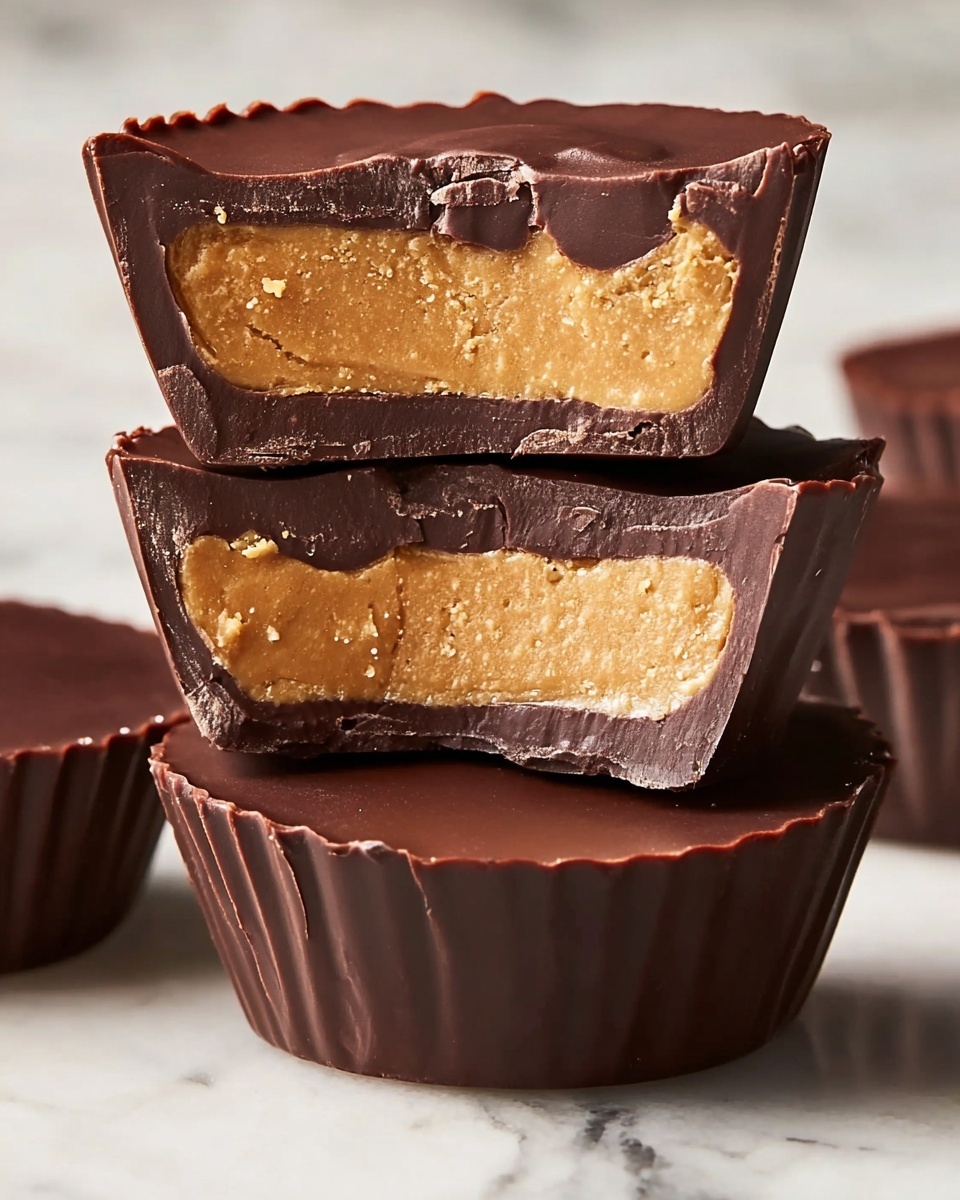
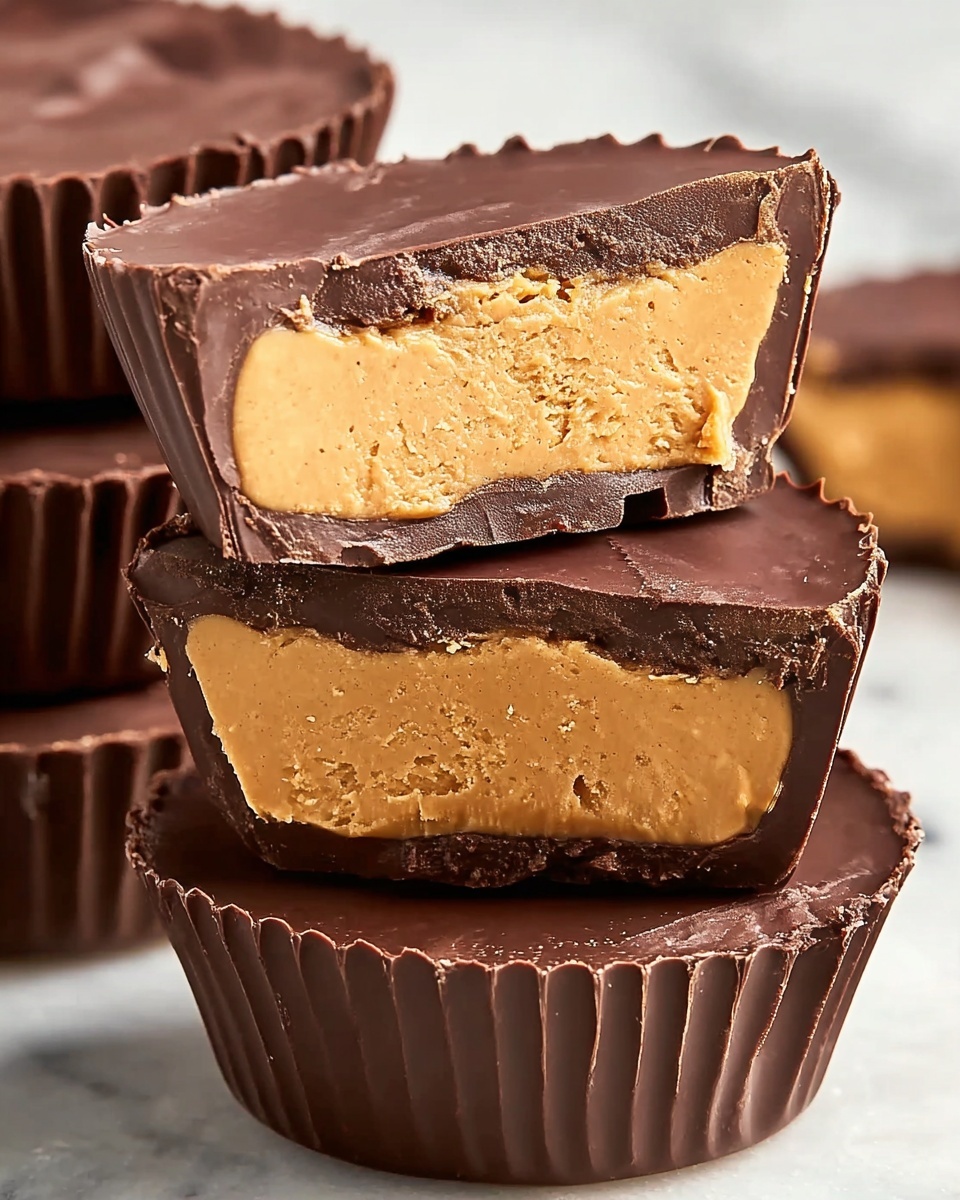
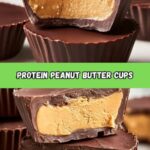
The Protein Peanut Butter Cups Recipe is an absolute game-changer when it comes to satisfying your sweet tooth without sacrificing nutrition. Imagine biting into a rich, creamy peanut butter center wrapped in smooth, decadent chocolate, all packed with a boost of protein to keep you energized and satisfied. These homemade treats are simple to make, versatile, and perfect for a guilt-free snack or dessert that feels indulgent but fuels your body. Once you try this Protein Peanut Butter Cups Recipe, you’ll wonder how you ever lived without these delightful bites.
Ingredients You’ll Need
Each ingredient in this recipe plays a crucial role in balancing flavor, texture, and nutritional value. From the creamy peanut butter to the rich chocolate and the vanilla protein powder, every element contributes to making these peanut butter cups irresistibly delicious and wholesome.
- Semi-sweet chocolate chips (12 oz): Provides a rich and sweet chocolate coating that melts beautifully.
- Coconut oil (1 teaspoon, solid): Helps the chocolate melt smoothly and harden with a nice shine.
- Vanilla extract (1/4 teaspoon): Adds a subtle, aromatic sweetness to the chocolate layer.
- Natural creamy peanut butter (1/4 cup): The star of the filling with its creamy texture and authentic peanut taste.
- Pure maple syrup (2 tablespoons): Brings natural sweetness and moisture to the peanut butter filling.
- Vanilla protein powder (1/3 cup): Boosts protein content and enhances the vanilla flavor in the filling.
- Salt (1/4 teaspoon): Balances the sweetness and intensifies the peanut butter flavor.
How to Make Protein Peanut Butter Cups Recipe
Step 1: Prepare Your Muffin Tin
Start by lining a muffin tin with parchment paper muffin liners. This simple prep step prevents your peanut butter cups from sticking and makes it a breeze to pop them out once they’re ready. Trust me, you don’t want to skip this!
Step 2: Melt the Chocolate
Place the semi-sweet chocolate chips and solid coconut oil into a microwave-safe bowl. Heat the mixture in 30-second bursts, stirring well after each to ensure smooth melting. Once the chocolate is fully melted, mix in the vanilla extract to deepen that luscious chocolate flavor.
Step 3: Form the Chocolate Base
Drop a generous teaspoon of your melted chocolate into each muffin liner. Use the back of a spoon to spread the chocolate evenly to the edges, creating a solid, smooth base layer for your peanut butter cups. This will become the chocolate shell that holds everything together.
Step 4: Chill to Set the Base
Pop the muffin tin into the refrigerator to let the chocolate firm up. This ensures the base is set before adding the peanut butter filling, which helps maintain the shape and prevents mixing of layers.
Step 5: Soften the Peanut Butter
While the chocolate chills, warm the peanut butter in a microwave-safe bowl for 15–20 seconds until it’s soft and easy to stir. This helps create a smooth and creamy filling that’s easy to mix with the other ingredients.
Step 6: Mix the Peanut Butter Filling
Stir the softened peanut butter together with the vanilla protein powder, salt, and maple syrup until everything is fully combined, creating a thick, luscious mixture that delivers flavor and protein in every bite.
Step 7: Shape and Add the Peanut Butter Discs
Divide the peanut butter mixture into 12 equal portions, shaping each by hand into small discs slightly smaller than your muffin liners. Gently press each disc onto the chilled chocolate base in the muffin tin, being careful to keep them centered.
Step 8: Top with Remaining Chocolate
If the leftover chocolate has thickened, warm it briefly in the microwave for 15–20 seconds to restore its silky texture. Drizzle or spoon the chocolate over each peanut butter disc, smoothing it out to the edges to fully enclose the filling.
Step 9: Final Chill to Set
Return the muffin tin to the refrigerator for at least one hour, allowing the chocolate and peanut butter layers to solidify completely. This step ensures your peanut butter cups hold their shape and are deliciously firm.
Step 10: Enjoy Your Homemade Protein Peanut Butter Cups
Once set, these treats are ready to devour! Enjoy immediately, or keep them stored for later snacking—either way, these protein-packed delights are sure to satisfy your cravings.
How to Serve Protein Peanut Butter Cups Recipe
Garnishes
Enhance your Protein Peanut Butter Cups Recipe by sprinkling a pinch of flaky sea salt on top for a subtle crunch and flavor contrast, or add a few crushed peanuts to intensify the nuttiness and texture. A drizzle of melted dark chocolate over finished cups also creates a stunning presentation.
Side Dishes
Serve these peanut butter cups alongside a fresh fruit platter like sliced strawberries or apple wedges to add a refreshing and healthy balance. They also pair beautifully with a warm mug of coffee or creamy almond milk for the perfect snack break.
Creative Ways to Present
For a special occasion, place your peanut butter cups in decorative mini cupcake liners and arrange them on a pretty platter. You can also wrap each cup individually in colorful parchment or cellophane to create delightful homemade gifts. Get creative by layering them between wax paper sheets in a box for a neat and appealing look.
Make Ahead and Storage
Storing Leftovers
Leftover protein peanut butter cups keep best in an airtight container in the refrigerator, where they stay fresh and firm for up to two weeks. This makes them a convenient, ready-to-go snack for busy days or a quick pick-me-up.
Freezing
If you want to keep these cups longer, freeze them in a sealed container or freezer bag for up to three months. Just separate layers with parchment paper so they don’t stick together, and thaw in the fridge before enjoying.
Reheating
Since these are chocolate-based treats, reheating isn’t necessary and can actually affect their texture. Instead, let frozen cups thaw fully in the refrigerator for about an hour before eating to enjoy the perfect creamy and firm consistency.
FAQs
Can I use other types of nut butter in this Protein Peanut Butter Cups Recipe?
Absolutely! Almond butter, cashew butter, or sunflower seed butter are excellent alternatives that still pair beautifully with chocolate and protein powder. Just make sure to choose creamy, natural versions for the best texture.
What type of protein powder works best for this recipe?
A good quality vanilla-flavored whey or plant-based protein powder works perfectly, adding flavor and nutrition without overpowering the peanut butter. Avoid flavored powders with strong or artificial tastes to keep your cups balanced.
Is it possible to make these peanut butter cups dairy-free?
Yes! Use dairy-free semi-sweet chocolate chips and a plant-based protein powder. The coconut oil also helps maintain a lovely smooth texture, making these cups suitable for many dietary preferences.
How long do these protein peanut butter cups last at room temperature?
Because of the peanut butter and protein filling, it’s best to store these cups in the fridge or freezer. At room temperature, they might get too soft or even spoil after a day or two, especially in warmer climates.
Can I adjust the sweetness in the Protein Peanut Butter Cups Recipe?
Definitely! The maple syrup provides natural sweetness, but feel free to add a bit more if you prefer sweeter cups, or reduce it if you want a more subtle taste. Just be mindful that altering sweetness may affect the texture slightly.
Final Thoughts
This Protein Peanut Butter Cups Recipe is my go-to whenever I want a snack that feels indulgent but actually fuels my body. The blend of creamy peanut butter, smooth chocolate, and vanilla protein powder comes together in the most delightful way, making these cups impossible to resist. Give this recipe a try—you might just find a new favorite treat to keep on hand for whenever a sweet craving strikes!
Print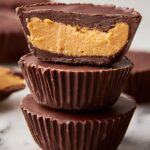
Protein Peanut Butter Cups Recipe
- Prep Time: 20 minutes
- Cook Time: 0 minutes
- Total Time: 1 hour 20 minutes
- Yield: 12 peanut butter cups
- Category: Dessert
- Method: No-Cook
- Cuisine: American
Description
Delicious and protein-packed homemade peanut butter cups made with semi-sweet chocolate, natural creamy peanut butter, vanilla protein powder, and a touch of maple syrup. These no-bake treats are perfect for a healthy snack or dessert with added protein and minimal ingredients.
Ingredients
Chocolate Layer
- 12 oz semi-sweet chocolate chips
- 1 teaspoon coconut oil (solid)
- 1/4 teaspoon vanilla extract
Peanut Butter Filling
- 1/4 cup natural creamy peanut butter (ingredients: peanuts + salt only)
- 2 tablespoons pure maple syrup
- 1/3 cup vanilla protein powder
- 1/4 teaspoon salt
Instructions
- Prepare Muffin Tin: Line a muffin tin with parchment paper muffin liners to prevent sticking and make it easy to remove the peanut butter cups later.
- Melt Chocolate: Combine chocolate chips and coconut oil in a microwave-safe bowl. Microwave in 30-second intervals, stirring after each until melted and smooth. Stir in vanilla extract.
- Form Chocolate Base: Pour 1 heaping teaspoon of melted chocolate into each muffin liner, spreading to the edges to form a flat layer. Repeat for all 12 liners.
- Set Chocolate Base: Refrigerate the muffin tin to allow the chocolate base to harden while preparing the filling.
- Prepare Peanut Butter Filling: Microwave peanut butter in a bowl for 15–20 seconds until runny. Stir in vanilla protein powder, salt, and maple syrup until smooth and creamy.
- Shape Filling: Divide the peanut butter mixture into 12 discs slightly smaller than muffin liners. Shape each disc by hand.
- Assemble Peanut Butter Cups: Remove muffin tin from fridge. Place a peanut butter disc on top of each chocolate base.
- Add Chocolate Topping: If chocolate has thickened, microwave 15–20 seconds to loosen. Drizzle remaining chocolate over each cup, smoothing to the edges to seal the filling.
- Set Peanut Butter Cups: Refrigerate for at least 1 hour or until cups are firm and fully set.
- Serve and Store: Enjoy immediately or store leftovers in an airtight container in the fridge or freezer for later.
Notes
- Use parchment paper liners for easy removal of cups.
- Natural peanut butter with only peanuts and salt is recommended for best flavor.
- Microwave times may vary; heat the chocolate and peanut butter gradually to avoid burning.
- These peanut butter cups can be stored in the refrigerator for up to 1 week or frozen for longer storage.
