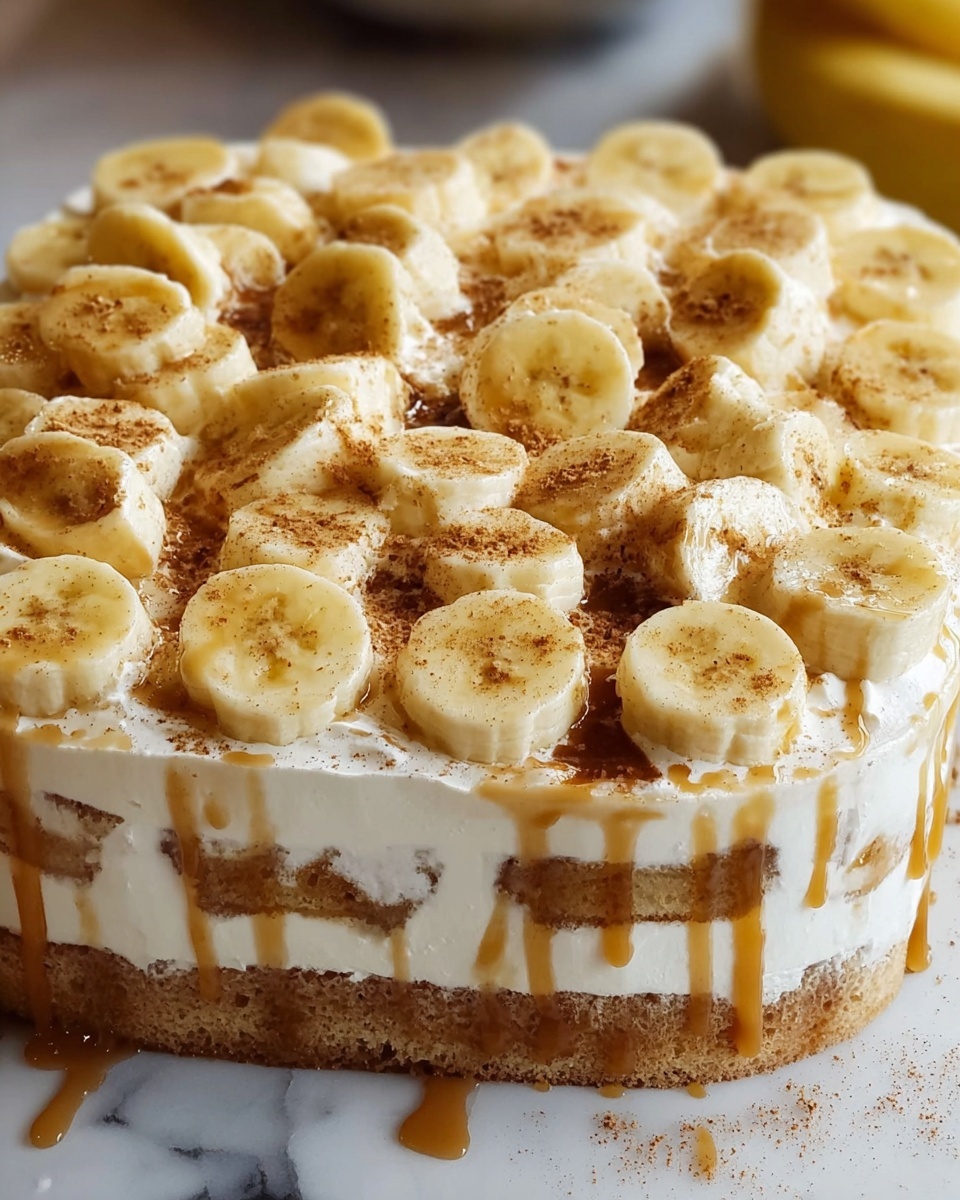
If you’re craving a dessert that feels like a warm hug on a plate, you’ve just found the holy grail with The Best Banana Pudding Ever Recipe. This luscious treat layers crisp vanilla wafers and ripe bananas with a dreamy, creamy pudding that’s magically light yet indulgent. Each spoonful offers a delightful mix of textures and flavors that’s sure to become your next go-to dessert whether for family dinners or special gatherings. Trust me, once you try this recipe, banana pudding will never be the same again.
Ingredients You’ll Need
This recipe shines because of its simple, timeless ingredients, each working together to create a perfect balance of creamy, crunchy, and fruity goodness. You probably already have most of these staples in your pantry or fridge, making this dessert both accessible and irresistible.
- Vanilla Wafers: The crispy base and topping that add just the right crunch and nostalgic flavor.
- Bananas: Six to eight ripe ones sliced fresh to bring natural sweetness and a soft, silky texture.
- Milk: Two cups to blend smooth, creamy pudding using French Vanilla pudding mix.
- French Vanilla Pudding Mix: The key to that dreamy, rich pudding base.
- Cream Cheese: A whole 8 oz. softened package to add velvety richness and a slight tang.
- Sweetened Condensed Milk: Adds luscious sweetness and a creamy depth that’s oh-so dreamy.
- Frozen Whipped Topping or Sweetened Whipped Cream: Twelve ounces thawed, this keeps the pudding airy and light.
How to Make The Best Banana Pudding Ever Recipe
Step 1: Layer the Base
Start by lining the bottom of a 13×9-inch dish with a bag of vanilla wafers. These wafers form the perfect crispy foundation for the pudding. Next, evenly layer your sliced bananas over the wafers, making sure every corner gets a generous share of fresh, sweet banana slices.
Step 2: Prepare the Pudding
In a medium bowl, whisk the 2 cups of milk with the French Vanilla pudding mix. Using a handheld mixer, blend the mixture for about two minutes until it thickens into a smooth, creamy texture. This step is where the pudding truly starts to come alive.
Step 3: Cream Cheese Mixture
In a separate bowl, combine the softened cream cheese with the sweetened condensed milk. Mix these together until completely smooth and creamy, making sure there are no lumps. This mixture adds a rich, tangy depth to the pudding that sets it apart.
Step 4: Fold in Whipped Topping
Gently fold the thawed whipped topping into the cream cheese and condensed milk mixture. This keeps the texture light and airy while still maintaining that luscious creaminess.
Step 5: Combine Mixtures
Pour your cream cheese mixture into the bowl with the pudding and stir everything until wonderfully blended. This is where the pudding’s velvety magic really happens, creating a perfectly balanced, rich yet fluffy filling.
Step 6: Assemble and Chill
Pour this beautiful pudding mixture over the layered wafers and bananas in your dish, spreading it evenly to cover every bit. For the final touch, top the pudding with the remaining vanilla wafers for extra crunch.
Step 7: Refrigerate
Pop the assembled pudding into the fridge for at least 4 hours. The chilling time lets the flavors meld together and the wafers soften just enough to melt slightly into the pudding, creating that perfect bite.
How to Serve The Best Banana Pudding Ever Recipe
Garnishes
For a bit of flair and even more fun with textures, sprinkle crushed vanilla wafers or a few banana chips on top before serving. Fresh banana slices or a dollop of extra whipped cream are also lovely additions to elevate the presentation and taste.
Side Dishes
This pudding works wonderfully on its own as a rich dessert, but pairing it with light, fresh sides like a crisp green salad or a tangy fruit salad balances the meal beautifully. It’s a great finish to comfort food feasts or summertime cookouts.
Creative Ways to Present
Feeling fancy? Layer individual servings in pretty glass jars or clear bowls so everyone can admire the inviting layers of wafers, bananas, and creamy pudding. You can also serve it in a trifle dish for a show-stopping centerpiece at your next party.
Make Ahead and Storage
Storing Leftovers
Simply cover any leftovers with plastic wrap or an airtight lid and refrigerate. The pudding flavors deepen and the texture becomes even more harmonious after a night in the fridge. Consume within 3 days for the freshest experience.
Freezing
While freezing is possible, it may alter the pudding’s creamy texture and soften the bananas and wafers more than desired. If you must freeze, transfer to an airtight container and thaw slowly in the fridge before serving.
Reheating
This dessert is best enjoyed cold, so reheating is not recommended. If the pudding has been chilled or frozen, simply allow it to come to fridge temperature before serving for the best texture and flavor.
FAQs
Can I use fresh whipped cream instead of frozen whipped topping?
Absolutely! Fresh whipped cream works beautifully and adds a delightful freshness, just be sure to fold it gently to keep the pudding light and airy.
Is there a way to make this recipe dairy-free?
Yes! Substitute the milk with almond or oat milk, use a dairy-free pudding mix, and replace the cream cheese and whipped topping with vegan alternatives to keep it creamy and delicious.
How ripe should the bananas be?
Choose bananas that are ripe but not overly mushy — yellow with a few brown spots is perfect for sweetness without sacrificing texture.
Can I make this pudding ahead of time for a party?
Definitely. In fact, letting it chill for at least 4 hours or overnight allows the flavors to meld beautifully, making it an ideal make-ahead dessert.
Why do the wafers sometimes get soggy?
The wafers soften as they absorb moisture from the pudding and bananas, which is exactly what makes the texture so irresistible. If you prefer crunch, add some wafers just before serving.
Final Thoughts
There’s nothing quite like sharing a bowl of The Best Banana Pudding Ever Recipe with friends and family to make moments feel extra special. With its perfect blend of crunch, creaminess, and fruity freshness, this dessert is destined to become a staple in your recipe box. I can’t wait for you to make it, savor it, and fall in love just like I did!
Print
The Best Banana Pudding Ever Recipe
- Prep Time: 15 minutes
- Cook Time: 0 minutes
- Total Time: 4 hours 15 minutes
- Yield: 12 servings
- Category: Dessert
- Method: No-Cook
- Cuisine: American
- Diet: Vegetarian
Description
A creamy and delightful layered banana pudding dessert featuring vanilla wafers, sliced bananas, and a luscious pudding and cream cheese mixture, perfect for parties or family gatherings.
Ingredients
Base and Topping
- 2 boxes Vanilla Wafers
- 6 to 8 bananas, sliced
Pudding Mixture
- 2 cups milk
- 1 (5 oz.) box French Vanilla pudding mix
Cream Cheese Mixture
- 1 (8 oz.) package cream cheese, softened
- 1 (14 oz.) can sweetened condensed milk
- 1 (12 oz.) container frozen whipped topping, thawed, or equal amount of sweetened whipped cream
Instructions
- Prepare the base: Line the bottom of a 13×9-inch dish with one box of vanilla wafers. Then, arrange the sliced bananas evenly on top of the wafers to create the first layer of the dessert.
- Make the pudding: In a medium bowl, combine the milk and French Vanilla pudding mix. Using a handheld electric mixer, blend the mixture thoroughly until it thickens, which usually takes about 2 minutes.
- Prepare cream cheese mixture: In another bowl, mix the softened cream cheese and sweetened condensed milk until the texture is smooth and creamy without lumps.
- Fold in whipped topping: Gently fold the thawed whipped topping or sweetened whipped cream into the cream cheese mixture, taking care to keep the mixture light and fluffy.
- Combine mixtures: Add the cream cheese mixture to the prepared pudding mixture and stir gently but thoroughly until everything is evenly blended.
- Layer the pudding: Pour the combined pudding and cream cheese mixture over the banana and vanilla wafer layer in the dish, spreading it out evenly with a spatula.
- Add topping layer: Sprinkle or layer the remaining vanilla wafers evenly on top of the pudding mixture to add a crunchy texture.
- Chill: Refrigerate the banana pudding for at least 4 hours before serving to allow the flavors to meld and the dessert to set properly.
Notes
- For best results, use ripe but firm bananas to avoid mushy layers.
- Chill the dessert overnight for even better flavor and texture.
- You can substitute whipped topping with homemade whipped cream if preferred.
- Store leftovers covered in the refrigerator for up to 3 days.
- For added texture, sprinkle crushed vanilla wafers or toasted pecans on top before serving.


